How to Make Tuiles That Stay Crispy and Look Fancy Without Losing Your Mind
Ever tried to bake something so delicate it feels like one deep breath could shatter it? That’s a tuile.
Thin, golden, and usually curled over like a potato chip in formalwear.
It’s the kind of cookie you see on restaurant desserts and think… “Yeah, not making that at home.”
And then maybe you try.
You follow a recipe. It kind of works, but they either go soft, burn around the edges, or don’t curve like they’re supposed to. You end up with a tray of floppy pancakes that taste good but look like something out of a craft fail post.
Let’s fix that. We’ll walk through the real steps, with none of the fluff and just enough precision to keep things from falling apart.
Need a dessert that chills instead of bakes? This no-churn roasted strawberry ice cream would love a tuile on top.
What Are Tuiles?

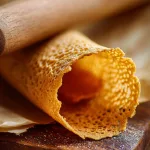
Tuiles (say it: tweels) are whisper-thin cookies that look like tiny roof tiles.
That’s where the name comes from – “tuile” is French for tile.
Classic ones are made with egg whites, flour, sugar, and butter.
They bake quick, and you shape them while they’re still warm.
They cool fast, crisp up even faster, and break if you stare too hard. But they’re worth it.
Once you get the hang of it, you’ll start putting them on everything. Mousse? Tuile. Panna cotta? Tuile. Leftover whipped cream and a spoon? Why not.
If you’re just starting out with classic desserts, this simple vanilla pudding recipe is the perfect base to pair with tuiles.
Ingredients To Make Basic Tuiles
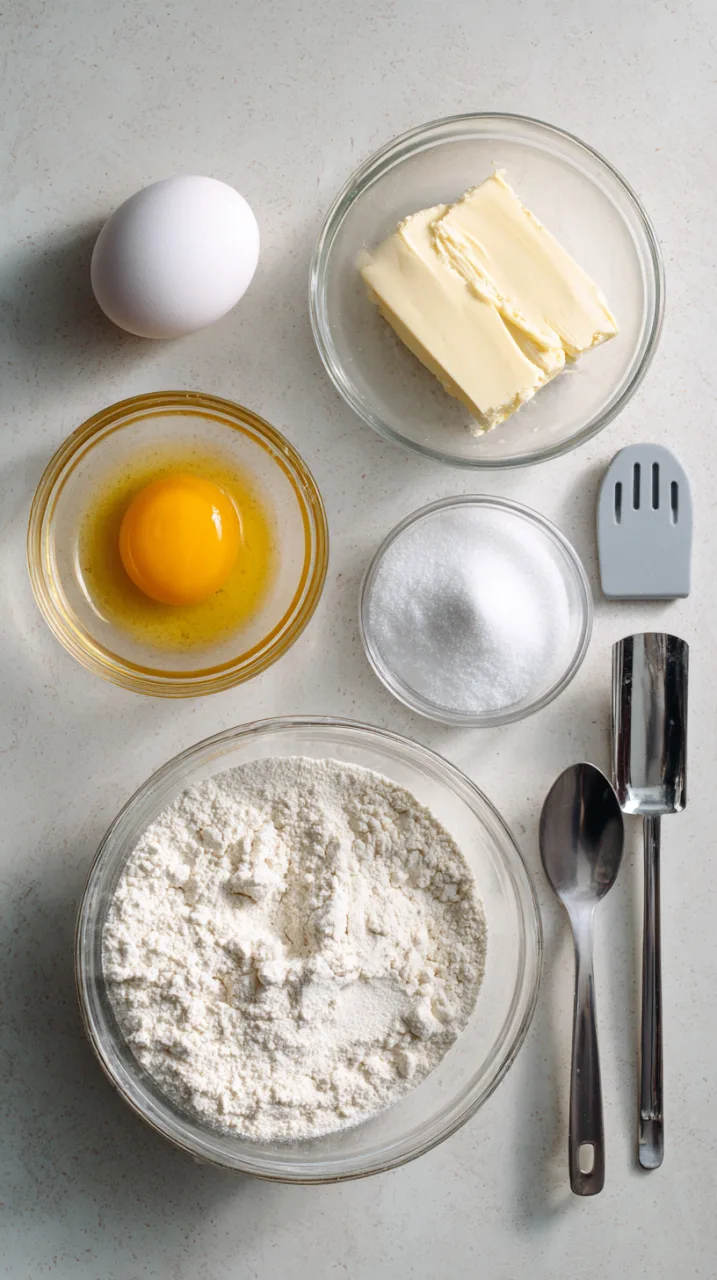
You only need four things:
- 1 egg white
- 1/4 cup sugar
- 1/4 cup flour
- 2 tablespoons melted butter
That’s the base. You can add a pinch of salt if you like balance.
A drop of vanilla never hurts. Want to feel fancy? Grate in a little orange zest or swap in almond flour for a nuttier flavor.
Just keep the basic ratio the same: equal sugar and flour, half as much butter, one egg white per quarter cup of flour. You can scale it up or down easy.
Equipment
Grab a bowl, a whisk, a silicone spatula, and a baking sheet.
Silicone baking mats are ideal.
Parchment works too but tends to curl.
If you’ve got an offset spatula, use it. A stencil’s cool if you have one, but it’s not required. And have something round handy to shape them – bottle, rolling pin, can of beans, whatever.
Not sure what tools count as essential? This guide to names of cooking equipment breaks it all down so you can stock your kitchen with confidence.
Making the Batter (It’s Quicker Than You Think)
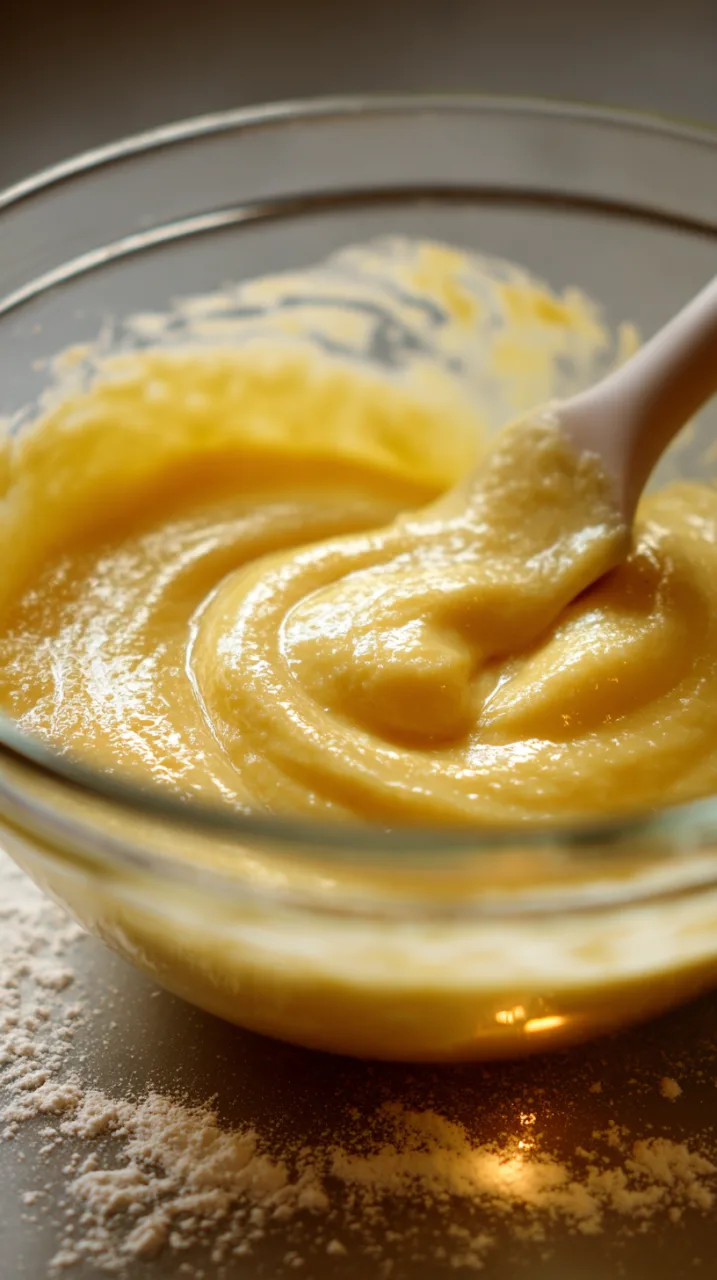
Melt the butter first so it has time to cool. Whisk the egg white just until it’s frothy, not stiff. Dump in the sugar and give it a solid mix. Add the flour and stir again. Then pour in that cooled butter. That’s it.
What you’re aiming for is a batter that spreads like warm pudding. It shouldn’t be runny like milk or stiff like frosting. Somewhere right in the middle. If it’s gloopy, add a teaspoon of water. If it’s runny, chill it.
Measuring properly makes all the difference in batters like this. Here’s how to measure baking ingredients the right way without guessing.
Chill It (Seriously, Don’t Skip This)
Stick the bowl in the fridge for an hour.
You could probably bake right away, but chilled batter spreads smoother and stays put.
It’s also easier to control, especially if you’re working in warm weather.
Spreading It Thin (This Part Matters Most)
Take a spoonful of chilled batter and plop it onto your silicone mat.
Now use the back of a spoon or your offset spatula to gently smear it into a thin circle. Like paper thin. Less than a millimeter.
If you can see the mat through it, that’s about right.
Too thick and they won’t curl. Too thin and they’ll burn in seconds. You’ll find the sweet spot by the second tray.
Bake Time and Temp
Preheat the oven to 325°F (160°C). Bake one tray at a time. These cook fast and uneven heat will mess with them.
Set a timer for 5 to 6 minutes. Peek at 5. You want the edges just turning golden and the center matte – not glossy. If the whole thing’s brown, it’s toast. Still tasty, but not what we want.
Shaping While Hot (Move Fast)
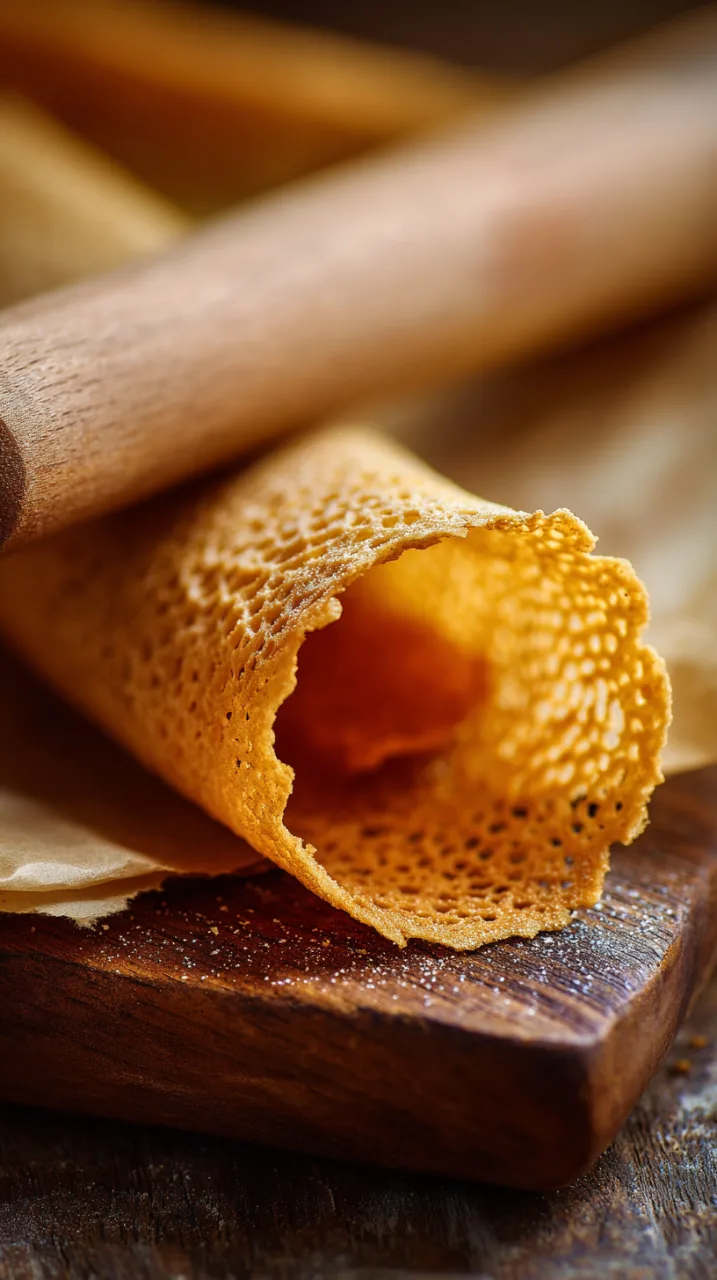
As soon as they come out, get to shaping.
Use a thin spatula or butter knife to lift the edge, then peel them up and drape over whatever curved object you’ve got. They’ll cool in seconds. Once they harden, you’re done.
Try shaping one. If it cracks, they cooled too much. Toss it in your mouth and move on.
Variations That Actually Work
- Almond tuiles: Swap in almond flour. Top with slivered almonds.
- Coconut: Add a tablespoon of shredded coconut. Makes them chewier but still crisp on the edges.
- Spiced: A pinch of cinnamon or cardamom goes a long way.
- Citrus: Orange or lemon zest in the batter. Brightens it up.
- Chocolate dipped: Let cool, then dip the edges in melted chocolate.
- Savory twist: Add a pinch of Parmesan and black pepper.
Don’t go nuts with wet mix-ins. They’ll mess with the texture.
A Few Tips That’ll Save You Headaches
- Always test one before doing a full tray.
- Work quickly once they come out of the oven.
- Keep your batter chilled if your kitchen’s hot.
- Bake in small batches.
- Don’t stack them until totally cool.
Want them extra crispy? Throw a food-safe desiccant pack in the storage container.
Storage & Shelf Life
Tuiles don’t love moisture. Store them in a tin or airtight box with a silica pack. Keep ‘em out of the fridge. If they soften, just pop them in a low oven (like 250°F) for 2 to 3 minutes to crisp back up.
Where They Shine
Ice cream toppers. Edible garnish for mousse or panna cotta. On top of cakes. Even just next to coffee or tea. They look like you spent all day making them, even if they only took 20 minutes.
Your Burning Tuile Questions, Answered
Do I need a stencil?
Nah. They look fine freehand.
Why are mine soft?
Could be too thick, underbaked, or stored in a damp place.
Can I freeze the batter?
Yes. Just thaw it in the fridge overnight and stir before using.
How do I get the lace effect?
Add a tiny splash of milk or juice to the batter. It spreads more and gives a lacy look.
Can I use aquafaba instead of egg whites?
Yep. It works okay. Crispiness may vary a bit.
Can I double the recipe?
Sure. Just keep the batter chilled and only bake what you can shape quickly.
Are they gluten-free?
Not by default, but almond flour or a 1:1 GF blend works well.
The Final Bite
If you made it this far, you’re probably the kind of person who finds joy in the little floury details.
That’s my kind of people.
I’m Ryan Yates, executive chef, culinary lifer, and the guy behind this recipe. For more honest, kitchen-tested recipes like this one, sign up for the Simply Delicious Newsletter. No spam. Just good food, once a week.