Your Search for the Perfect Empanada Dough Recipe Ends Here
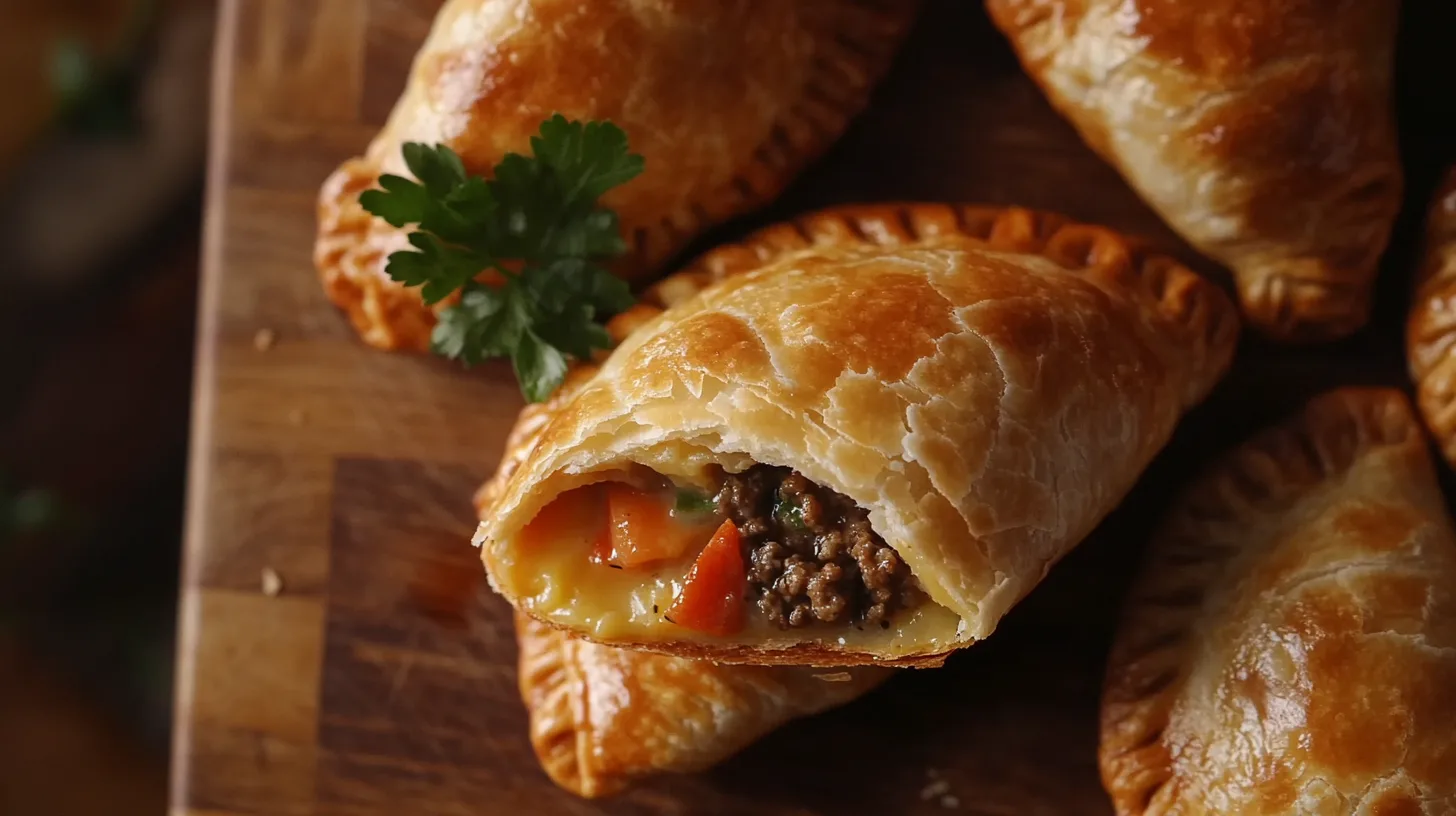
Ever bitten into a perfect empanada? That flaky, golden crust just melts in your mouth.
But if you’re anything like us, maybe you’ve also had your share of sad, tough, or just plain blah empanada dough experiences.
Store-bought pastry dough or pie dough can work. It often lacks that special something, you know?
Making it at home might seem tough.
Well, we’re here to tell you it’s simpler than you might think. We want to help make you a dough master. Get ready for delicious homemade empanadas.
Foolproof Empanada Dough Recipe: Step-by-Step Guide

Let us walk you through the whole process.
We are going to start with the stuff you need and then get into making the dough.
We want you to feel like you are right there with us, even if your kitchen is miles away.
Each step here will give you confidence.
Once you master this you will be ready to make a variety of dishes such as our best baked ziti recipe.
Ingredients for This Empanada Dough Recipe
First, grab your ingredients. We use everyday items, most of which might already be in your kitchen. Each ingredient plays a part in creating that perfect dough.
- All-Purpose Flour: This is what holds your dough together. Good old all-purpose flour works great. Some folks like pastry flour for extra flakiness.
- Salt: Just a bit wakes up all the other flavors. It might seem small, but trust us, salt is really important.
- Sugar: A little bit helps balance flavors and makes the dough brown up nicely when it cooks.
- Cold Unsalted Butter: This makes the dough flaky. The secret is to use it cold, straight from the fridge. Butter tastes great. Lard or shortening can work, too. If you use lard or shortening use 3/4 of a cup instead of a full cup of butter.
- Large Egg: One egg helps bind the dough. It makes it a little richer.
- Ice Water: We need cold water to keep the butter from melting. You want little bits of butter throughout the dough. That makes it flaky.
- White Vinegar: Our little secret weapon! Vinegar stops the dough from getting tough. Your empanadas will be nice and tender.
For more baking tips and tricks, don’t forget to check out our guide on grams to cups conversion made simple, which can be a lifesaver when experimenting with new recipes.
How To Mix Empanada Dough

Now that we have our stuff together, we can start mixing. Try not to rush this part. Just follow these steps, you’ll do great. A good mix now means great empanadas later.
First, you gotta mix the dry ingredients.
Grab a big bowl and whisk together the flour, salt, and sugar. Get a good mix going.
Next, we deal with the butter.
Cut it into small pieces.
Toss the butter into the flour mix. Now, use your fingers or a pastry cutter to work the butter into the flour.
You want it to look like coarse crumbs with little bits of butter still there.
Next, in another little bowl, beat the egg with the ice water and vinegar.
Then slowly pour this wet mix into your dry mix.
Gently stir it with a fork.
When it starts to come together, use your hands. You want to bring it all into a ball, but don’t overdo it.
We don’t want to work the dough too much or it can get tough.
When it is all in a ball stop.
Chilling the Empanada Dough And Why It Matters.

We have to put the dough in the fridge for a bit. Cover it in plastic wrap, put it in the coldest part of your fridge. Let it chill for at least 30 minutes.
A whole hour is even better.
It lets the gluten relax, so the dough doesn’t get tough.
It also lets the butter get cold again, which is important for flakiness. While the dough chills, you can start thinking about your fillings. Or, take a break – you’ve earned it.
Rolling and Shaping Your Empanada Dough

After it has chilled take your dough and cut it in half.
Keep one half wrapped up and place it back in the fridge.
Now lightly dust your counter with flour.
Put one of the dough halves on the floured surface and grab your rolling pin.
Roll the dough out until it’s about 1/8-inch thick.
Then, take a cookie cutter, maybe 4-6 inches wide and cut out circles.
You can re-roll the scraps of dough to get a couple more. Repeat these steps with the other half of the dough.
These are going to be your empanadas, so make them a size you like.
Baking vs. Frying And Which Method is Right for You?
You can cook your empanadas two ways: baking or frying.
Both are tasty, each one gives the empanadas a different feel.
Baked empanadas are a little healthier.
Frying makes them extra crispy.
This recipe works great for both, it just depends on what you’re craving.
Let’s chat about how to get each one just right.
Baking Your Empanadas
First off, heat your oven to 375°F (190°C).
Line a baking sheet with parchment paper. It keeps the empanadas from sticking and makes cleanup easy later.
Place your filled empanadas on the sheet.
Leave a little space between each one. They need room to bake evenly.
Now, you can brush them with an egg wash.
Beat an egg with a little water. Brush it over the tops. This gives them a nice, shiny, golden-brown color as they bake.
Pop them in the oven for about 18-22 minutes. You want them golden brown and cooked through.
Frying Your Empanadas
Frying gives empanadas a crispy, crunchy crust.
Pour about two inches of oil into a big pot. Heat the oil to 350°F (175°C).
A kitchen thermometer helps get the temperature right.
Drop a little piece of dough into the oil. It should sizzle right away.
Carefully lower a few empanadas into the hot oil with a slotted spoon. Fry them for 2-3 minutes on each side.
Flip them over when they’re golden brown on the bottom.
When they’re golden all over, take them out. Place them on a plate lined with paper towels.
The paper towels will soak up any extra oil.
Whether you bake or fry, keep an eye on the cooking time, much like when you’re making a batch of our crispy zucchini chips recipe to ensure a perfect golden-brown finish.
Empanada Dough Recipe
Print
Foolproof Empanada Dough Recipe
- Prep Time: 20 minutes
- Chill Time: 30 minutes
- Cook Time: 20 minutes (baking) or 3-5 minutes (frying)
- Total Time: 1 hour 15 minutes
- Yield: 12–16 empanadas, depending on size 1x
- Category: Appetizer, Main Course, Snack
- Method: Baking, Frying
- Cuisine: Latin American
Description
This is the last empanada dough recipe you’ll need. I spent countless hours comparing popular recipes and found commonalities between them. This recipe is special because it takes those commonalities and adds a touch of vinegar to guarantee the most tender and delicious dough. You can use it for baking or frying, so get ready to make the best empanadas, from my kitchen to yours! This dough is easy to work with and bakes or fries to golden perfection. Whether you’re a seasoned empanada maker or a first-timer, this recipe will have you turning out impressive pastries in no time.
Equipment:
- Mixing bowls
- Pastry cutter or food processor
- Measuring cups and spoons
- Plastic wrap
- Rolling pin
- Round cookie cutter or a knife
- Baking sheet or large pot for frying
- Parchment Paper
Ingredients
- 3 cups all-purpose flour, plus more for dusting
- 1 teaspoon salt
- 1 teaspoon sugar
- 1 cup (2 sticks) very cold unsalted butter, cut into small cubes (or 3/4 cup lard, or 3/4 cup shortening)
- 1 large egg, lightly beaten
- 1/2 cup ice water, plus more if needed
- 1 tablespoon white vinegar
Instructions
- Mix the dry ingredients: In a large mixing bowl, whisk together the flour, salt, and sugar until well combined.
- Cut in the fat: Add the cold butter to the flour mixture. Use a pastry cutter or your fingertips to cut the butter into the flour until the mixture resembles coarse crumbs with some pea-sized pieces of butter remaining. You can also pulse the mixture a few times in a food processor, but be careful not to overmix.
- Combine the wet ingredients: In a separate bowl, whisk together the lightly beaten egg, ice water, and white vinegar.
- Gradually add liquid to dry ingredients: Make a well in the center of the flour mixture and gradually pour in the egg mixture. Using a fork or your hands, gently mix the wet and dry ingredients until the dough just starts to come together. If the dough seems too dry, add more ice water, 1 tablespoon at a time, until it reaches the desired consistency. Be careful not to overwork the dough.
- Chill the dough: Turn the dough out onto a lightly floured surface and gently shape it into a disc. Wrap the disc tightly in plastic wrap and refrigerate for at least 30 minutes, or up to 2 days.
- Roll out and cut the dough: Once the dough is chilled, divide it into two equal portions. On a lightly floured surface, roll out one portion of the dough into a 1/8-inch thick circle. Using a round cookie cutter (4-6 inches in diameter) or a knife, cut out circles from the rolled-out dough. Repeat with the remaining dough.
- Fill and seal the empanadas: Spoon your desired filling onto the center of each dough circle, leaving a 1/2-inch border around the edge. Fold the dough over the filling to create a half-moon shape. Press the edges firmly with your fingers or a fork to seal the empanadas.
- Bake or Fry:
- Baking: Preheat oven to 375°F (190°C). Place empanadas on a parchment-lined baking sheet. Brush with egg wash (1 egg beaten with 1 tablespoon water) for a golden crust. Bake for 18-22 minutes, or until golden brown.
- Frying: Heat about 2 inches of oil in a large pot to 350°F (175°C). Carefully fry empanadas in batches for 2-3 minutes per side, or until golden brown and cooked through. Remove with a slotted spoon and drain on paper towels.
- Serve warm and enjoy!
Notes
- The Secret Ingredient: The addition of vinegar is what sets this recipe apart. Vinegar helps to inhibit gluten development, resulting in a more tender and flaky crust. It’s a subtle change, but it makes a noticeable difference in the final product. This is a technique often used in pie crusts.
- Fat Choices: You can use butter, lard, or shortening for this recipe. Butter provides the best flavor, while lard and shortening may result in a slightly flakier crust. If you use lard or shortening use 3/4 of a cup instead of a full cup.
- Don’t Overmix: Overmixing the dough can lead to a tough crust. Mix only until the ingredients are just combined.
- Chill Out: Chilling the dough is crucial for allowing the gluten to relax and the fat to solidify, which helps create a flaky crust.
- Filling Possibilities: Get creative with your fillings! Some popular options include seasoned ground beef, chicken, cheese, vegetables, or even sweet fillings like fruit or dulce de leche.
- Make Ahead: You can make the dough ahead of time and store it in the refrigerator for up to 2 days or freeze it for up to 3 months.
- Freeze Unbaked Empanadas: Arrange uncooked empanadas in a single layer on a baking sheet lined with parchment paper and freeze until solid. Transfer to a freezer bag for longer storage. Bake or fry directly from frozen, adding a few extra minutes to the cooking time.
Nutrition
- Serving Size: 1 Empanada Depending On Filling
- Calories: 250-350
- Sugar: 1-2g
- Sodium: 200-300mg
- Fat: 15-20g
- Saturated Fat: 8-12g
- Carbohydrates: 30-40g
- Fiber: 1-2g
- Protein: 5-7g
- Cholesterol: 40-60mg
Perfect Empanadas And Tips and Tricks for Success
We’ve made a lot of empanadas. We want to share some tips we’ve learned.
Use good ingredients.
Fresh flour, cold butter – it all adds up. Don’t be afraid to try different fats. Butter tastes great, but lard or shortening can make the dough even flakier. Just use 3/4 cup of lard or shortening instead of a full cup of butter.
Make sure your water is ice cold, it keeps those little bits of butter from melting too soon.
Do not overmix the dough.
A little bit of mixing is all it takes.
If you work it too much, the empanadas will be tough.
Chill the dough like we said before.
It’s important, don’t skip it.
Roll it out thin, but not too thin. About 1/8 of an inch is good.
Seal the edges well, you do not want your filling falling out when they cook.
The back of a fork works great for this.
For a truly tender dough, consider chilling it a little longer, a technique that also works wonders in our sour cream coffee cake recipe.
Storing and Freezing Your Homemade Empanada Dough
Sometimes you want to make dough ahead of time.
Or, you might have leftovers.
No problem, this dough is easy to store.
You can keep it in the fridge for a couple of days. Just wrap it tightly in plastic wrap.
For longer storage, you can freeze it. Wrap it well in plastic wrap, then put it in a freezer bag. It should keep for about three months. Thaw it in the fridge overnight when you’re ready to use it. You can freeze the whole disc of dough. You can freeze the cut-out circles. Or, even freeze the assembled, unbaked empanadas. Just lay them flat on a baking sheet, freeze them until they’re solid, then pop them in a freezer bag.
Flavor Variations for Empanada Dough
Our basic recipe is great.
You can also have fun with it and try new things.
Add a teaspoon of your favorite spices to the dry ingredients.
Smoked paprika, maybe a pinch of cayenne for heat.
Some herbs like dried oregano or thyme could be good, too.
For a sweeter dough, add a bit more sugar.
You can even add a little bit of citrus zest. Lemon or orange zest can brighten up the flavor.
Feel free to experiment with spices in your dough, similar to how we use unique spice blends in our loaded queso dip recipe.
Filling Ideas for Your Empanadas
The filling is where you can be really creative.
The classic is seasoned ground beef.
You can use chicken, pork, or even make them vegetarian.
Cheese, beans, and corn is a great combo.
Try some cooked sweet potato and black beans for something different.
You can go sweet, too. Apple or guava with a sprinkle of cinnamon.
How about Nutella and banana?
Don’t be scared to try new things. Mix and match flavors. See what you like best. That’s the fun of cooking, right?
Add some spice to your empanada dough, just like we did with our simple molcajete salsa recipe.
Nutritional Insights
Empanadas can be part of a balanced diet. It depends a lot on what you put inside. Each empanada made with this dough (without filling) has about 250-350 calories. They have some carbs from the flour, and fat from the butter. A bit of protein, too. If you’re watching your calories, baking might be a better choice than frying. Frying adds more fat and calories from the oil. Fillings can change the nutrition a lot. Veggies and lean meats are good choices. Cheese and fattier meats will add more calories and fat.
Ingredient Alternatives

Can’t find everything on our list?
Don’t worry, we have got some ideas.
No butter? Lard or shortening can work, each will give a slightly different flavor and texture. Remember to use less.
Gluten-free? Try a gluten-free flour blend made for baking.
We can not guarantee perfect results, but it is worth a try.
No white vinegar? Apple cider vinegar could work, it might just add a slight apple taste.
No eggs? Some people use a little extra water and a bit more fat.
The dough might be a little different, but it can still work.
FAQs On Empanada Dough
Sure, make the dough, wrap it up tight, and pop it in the fridge. It will keep for about two days. You can freeze it for later, too.
You probably need more water. Add a little bit more ice water, a tiny bit at a time. Mix it just until the dough comes together.
Sounds like too much water. Sprinkle in a little more flour. Work it in gently until it’s not sticky anymore.
Yes, butter, lard, shortening – they all work. Each one changes the flavor and texture a little. Use 3/4 cup of lard or shortening instead of a full cup of butter.
We like to roll it to about 1/8 of an inch thick. If it’s too thick, it won’t cook through. Too thin, it might tear.
After you put the filling in, fold the dough over. Press the edges together with your fingers or a fork. Make sure they’re sealed tight so the filling doesn’t leak out.
Could be a few things. Your oven might be too hot, or they might be too close to the bottom. Try a lower rack. If they are still burning, your oven might need to be calibrated.
The Final Bite
We’ve walked this empanada path together, and now the aroma is probably filling your kitchen.
That golden crust, the savory filling – it all comes down to this moment.
So go ahead, grab one of those beauties, and take that well-deserved bite.
We hope these bring you as much joy making them, as they do eating them. Happy cooking!
About the Author
Ryan Yates is a culinary expert with over 20 years of experience in commercial kitchens. As a working executive chef, he has a passion for creating delicious, accessible recipes that bring joy to home cooks everywhere. Ryan believes in the magic of simple ingredients and loves sharing his knowledge to help others find happiness in cooking.