How to Caramelize Onions Fast Without Ruining Them
You want caramelized onions. You start cooking. Thirty minutes pass, maybe forty, and they still look pale and sad. So you crank the heat. Now they’re burning on the edges but raw in the middle. Sound familiar? Most people hit this exact wall and give up.
The problem is that most recipes are vague. They say things like “cook on medium-low until golden” and leave out everything that actually matters – the pan, the moisture, the fat, when to stir, when not to stir. So you follow along and still end up with a disappointing mess.
This guide fixes that. We’re going to walk through a method that gets you deep, rich, properly caramelized onions in around 25 minutes, not an hour. There are a few specific tricks involved, and once you know them, you’ll never struggle with this again.
What Is Caramelizing Onions?
Caramelizing onions means cooking them slowly until their natural sugars break down and turn deep golden brown.
The result is sweet, soft, almost jammy onions with a rich, complex flavor that bears almost no resemblance to raw.
It’s not the same as sautéing.
Sautéed onions are cooked through but still a bit sharp.
Caramelized onions are something else entirely, sweeter, deeper, mellow. The process takes patience, but with the right technique, you can cut the time down significantly.

Who This Guide Is For
This is for you if:
- You’ve tried before and ended up with burnt or undercooked onions
- You’re a beginner in the kitchen and want clear, no-guesswork instructions
- You want a faster method that doesn’t sacrifice quality
- You’re cooking for a specific dish, burgers, French onion soup, pasta, pizza, and need this to go right
Why This Method Works
Here’s the science in plain terms.
Onions are mostly water.
Before any browning can happen, that water has to cook off. If your heat is too low, the onions just steam forever and never actually caramelize.
If your heat is too high, the outside scorches before the inside softens.
The trick is managing moisture on purpose.
We start with medium-high heat to drive off water fast, then we drop the heat and let the sugars develop slowly.
A small pinch of baking soda speeds up browning without burning.
A splash of liquid (water, wine, or broth) helps deglaze the pan and incorporate all those sticky browned bits back into the onions, which is where a ton of flavor lives.
Most tutorials skip these two steps entirely, which is why they take forever or come out wrong. This method doesn’t.
The two-stage heat approach used here follows the same foundational logic behind the sauté cooking method – high heat to start, controlled heat to finish, and understanding exactly why each stage does what it does.
Tools and Ingredients You’ll Need
You don’t need anything fancy. Here’s what to have on hand:
The Pan: A wide, heavy-bottomed skillet works best. Cast iron or stainless steel are ideal because they hold heat evenly. A nonstick pan works in a pinch but doesn’t develop the same fond (those browned bits on the pan bottom that add flavor).
Onions: Yellow onions are the standard for caramelizing, they have the right sugar content. Sweet onions like Vidalia work too and get even sweeter. White onions are fine. Red onions will work but turn a muddy color.
Fat: Butter gives the richest flavor. Olive oil works well and handles higher heat better. A mix of both is our favorite, the butter adds flavor, the oil keeps it from burning.
Optional speed booster: A tiny pinch of baking soda (1/8 teaspoon) accelerates browning noticeably. Use it sparingly, too much makes onions mushy.
Liquid for deglazing: A tablespoon or two of water, white wine, sherry, or beef broth. Each changes the flavor slightly. Water is perfectly fine.
If you’re still getting familiar with what each piece of cookware actually does in the kitchen, this guide to cooking equipment names and uses breaks down everything from Dutch ovens to flat-edged spatulas in plain terms.
Quick Guide: How to Caramelize Onions Fast
- Slice onions thin and even – about 1/4 inch thick.
- Heat fat in a wide pan over medium-high heat, then add onions and a pinch of salt.
- Stir frequently for the first 8–10 minutes while the moisture cooks off.
- Reduce heat to medium-low. Add a tiny pinch of baking soda and keep stirring every couple of minutes.
- Deglaze with a splash of liquid whenever the pan gets dry. Scrape up the browned bits.
- Cook until deeply golden, soft, and jammy – about 25 minutes total.
The detailed step-by-step instructions are below if you want to see exactly how we do it.
Step-By-Step Instructions
Step 1 – Slice the Onions Right
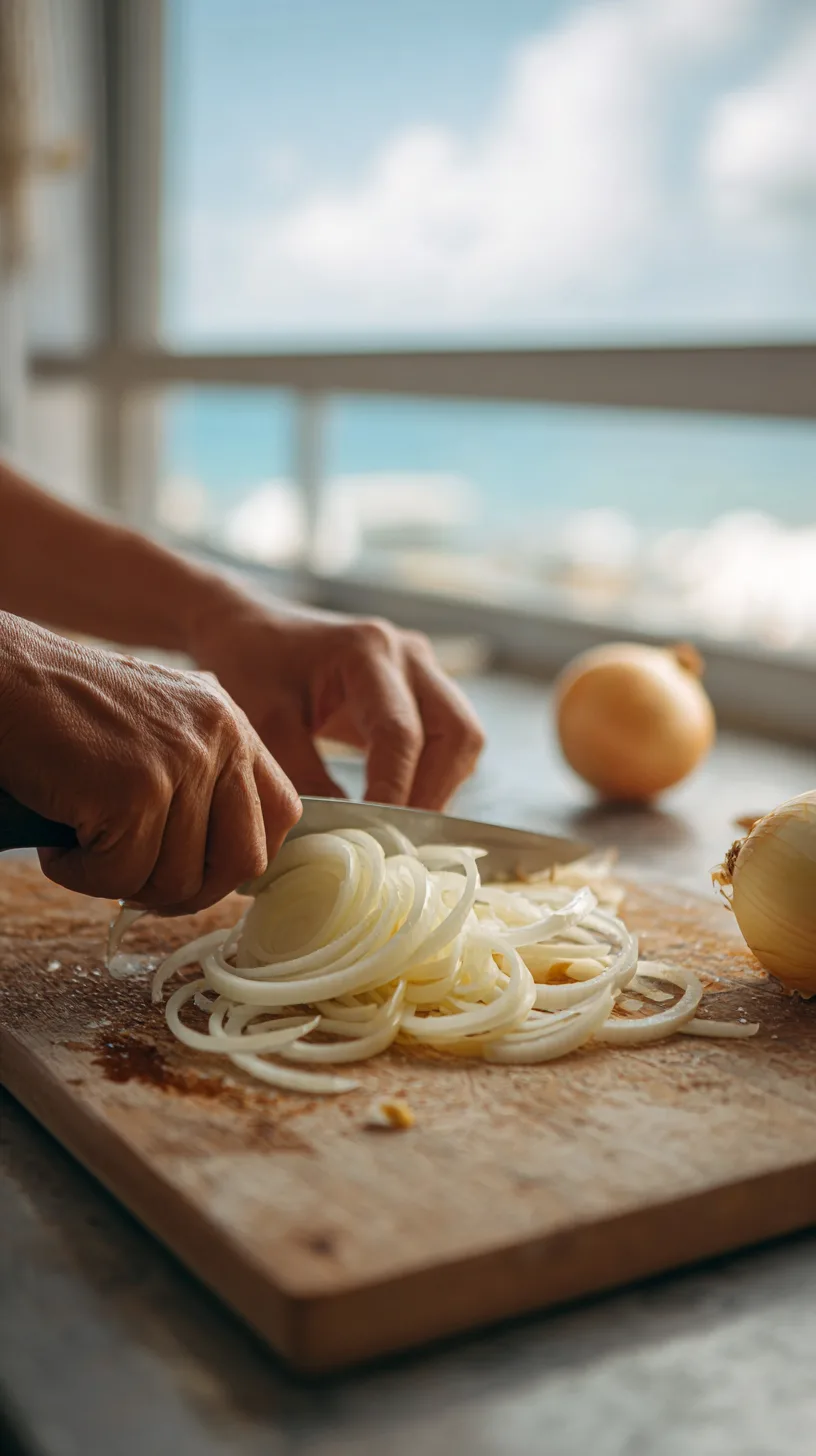
Cut off both ends of the onion, then slice it in half from root to tip.
Peel off the skin.
Lay each half flat and slice across into half-moon shapes, about 1/4 inch thick.
Try to keep the pieces roughly the same size. Uneven cuts mean some pieces burn while others are still raw.
One large onion yields about 1/2 cup of finished caramelized onions.
They shrink dramatically.
If you want a good amount, start with 3–4 onions.
The pan will look way too full at first, that’s normal.
Step 2 – Start on Medium-High Heat
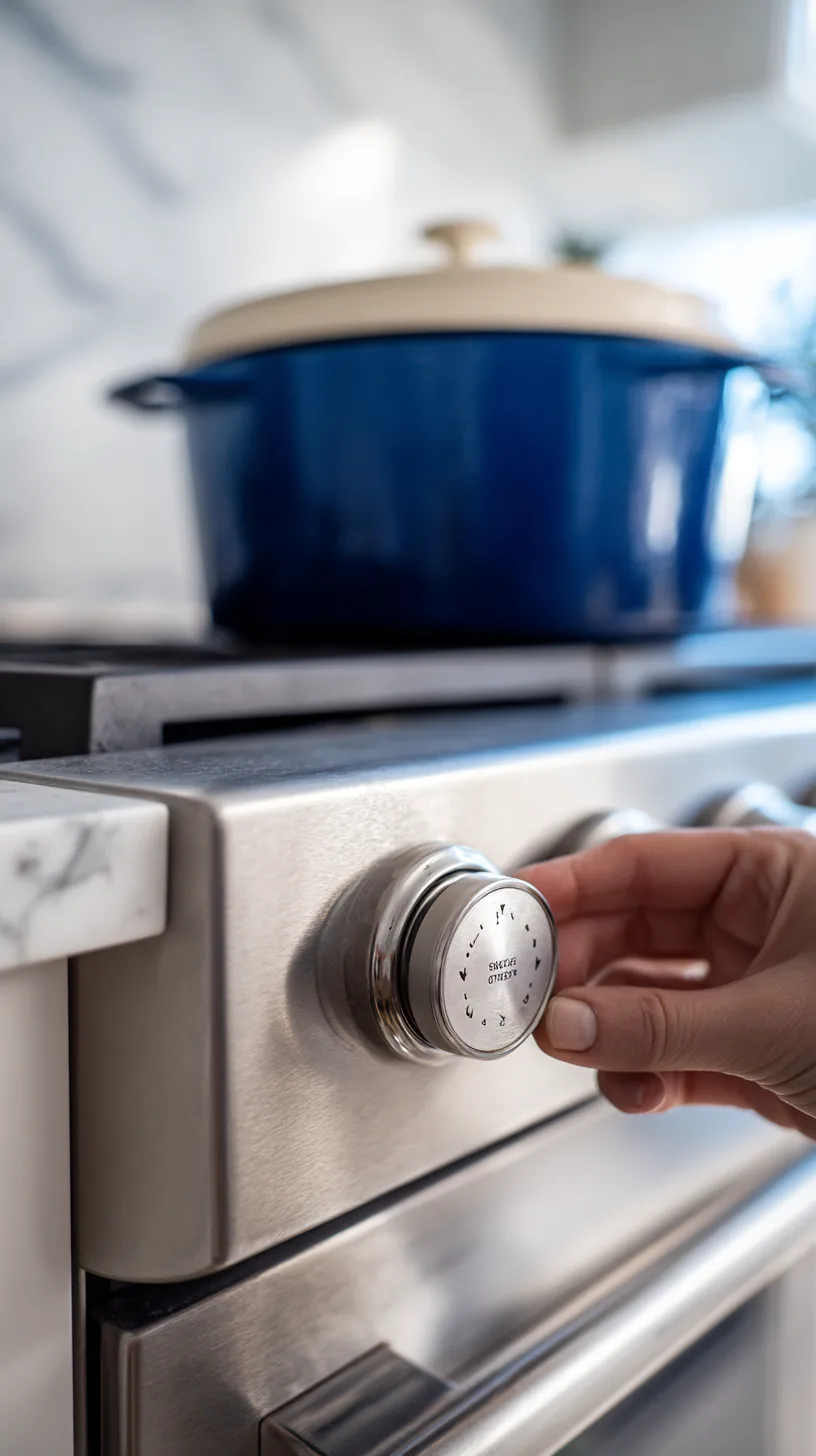
Put your pan over medium-high heat.
Add your fat, about 1 tablespoon of butter, 1 tablespoon of olive oil, or 2 tablespoons of either one.
Let it heat up until the butter foams or the oil shimmers.
Then add all the onions at once.
Immediately add a good pinch of salt.
Salt pulls moisture out of the onions and helps them soften faster.
Stir everything together.
The pan is going to look very full and maybe a little chaotic, that’s fine. Stir every minute or two.
Step 3 – Watch the Steam Cook Off
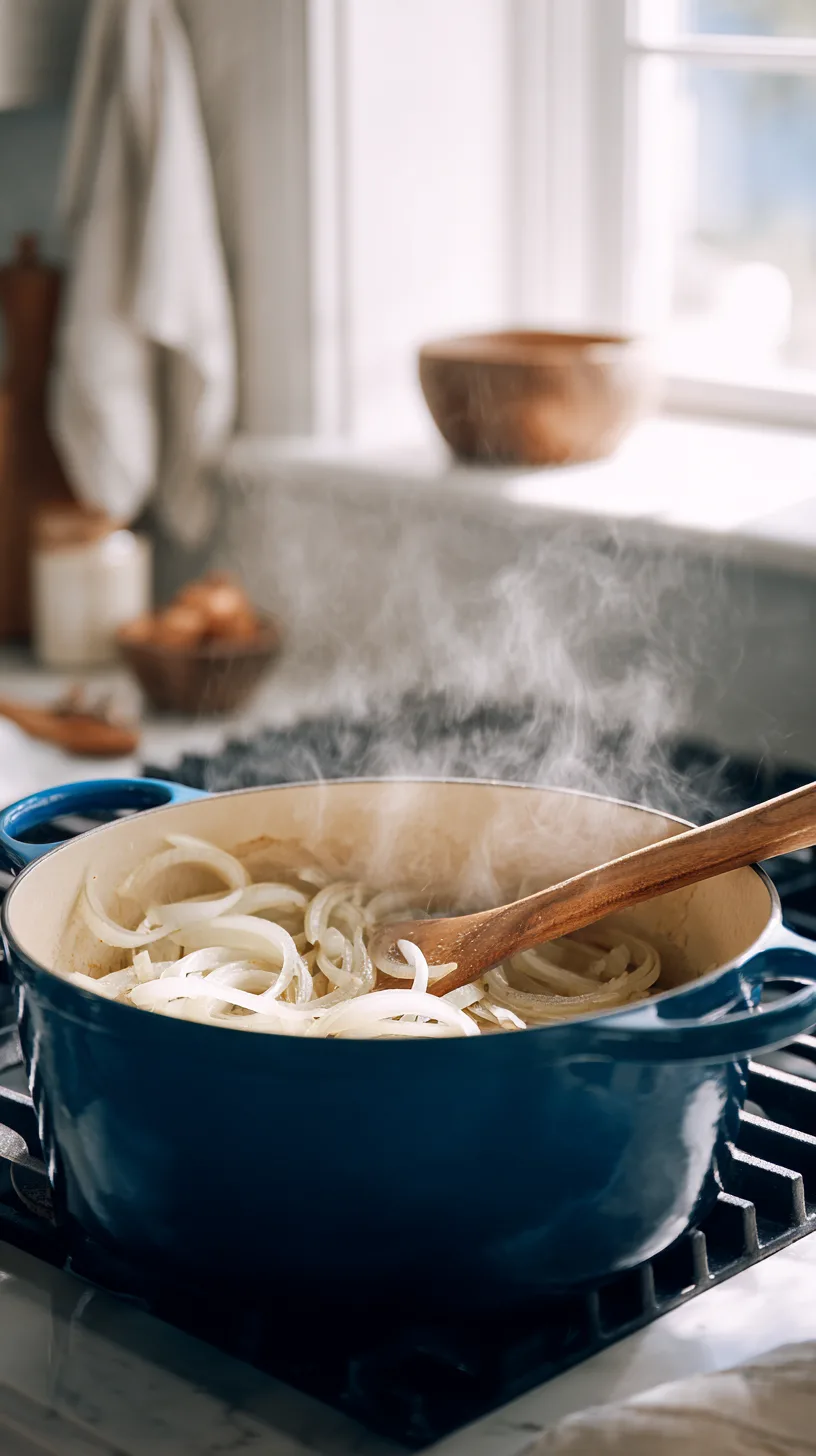
For the first 8–10 minutes, the onions are going to steam.
You’ll hear a loud sizzle when they first go in, and then it settles into a steady, soft sizzle.
The onions will turn translucent and start to collapse.
They’ll release a lot of liquid.
This is exactly what should happen.
Keep stirring every couple of minutes.
You’re not trying to brown them yet, just get the water out. If things are browning already before the onions have collapsed, lower the heat a little.
Step 4 – Drop the Heat and Add the Baking Soda

Once the onions have reduced in volume and look translucent and limp, usually around the 8–10 minute mark, drop the heat to medium-low.
Now add a tiny pinch of baking soda if you’re using it.
Stir it in well.
You might see a little bubbling, which is normal.
The baking soda raises the pH slightly, which speeds up the Maillard reaction (browning).
This is the trick that cuts your time from 45+ minutes down to around 25.
Don’t use more than 1/8 teaspoon or the onions will get a slightly odd, soft texture.
Step 5 – Deglaze and Keep Going
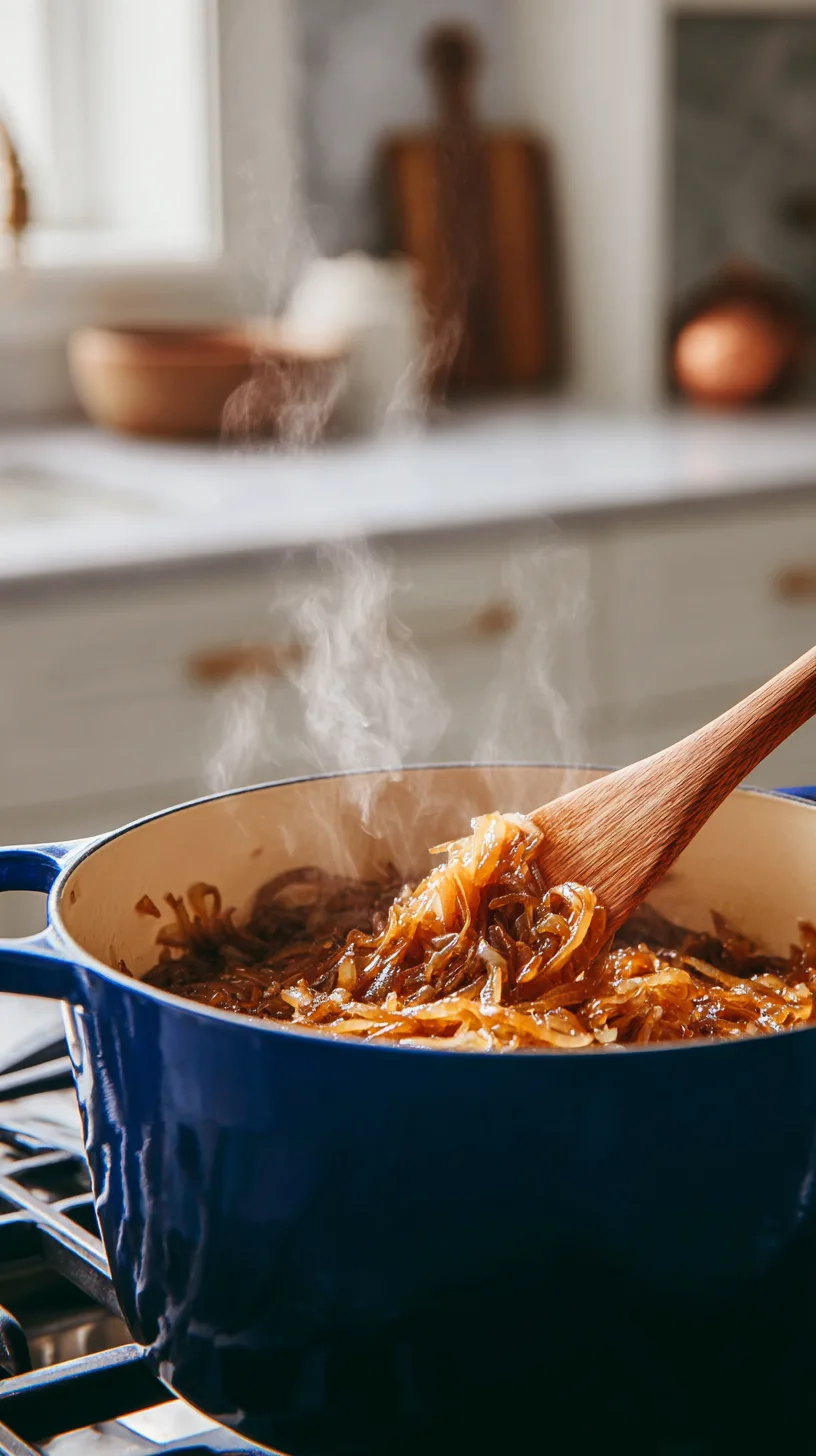
As the onions cook, sticky brown stuff will start building up on the bottom of the pan – this is called fond, and it’s packed with flavor.
When you see it forming, add a splash of liquid (about 1–2 tablespoons of water, wine, or broth) and scrape the bottom with a wooden spoon or spatula.
All that color gets pulled back into the onions.
Do this every few minutes as needed.
It keeps the onions from burning and adds incredible depth.
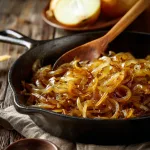
The onions will gradually go from pale gold to deep amber.
When they’re the color of dark caramel – not light tan, but actually deep brown – and they taste sweet and mellow with almost no sharpness left, they’re done.
If you want to go deeper on this technique and see how it works across other dishes and liquids, the full guide on how to deglaze a pan walks through every variation – wine, broth, vinegar, and beyond.
Step 6 – Finish and Taste
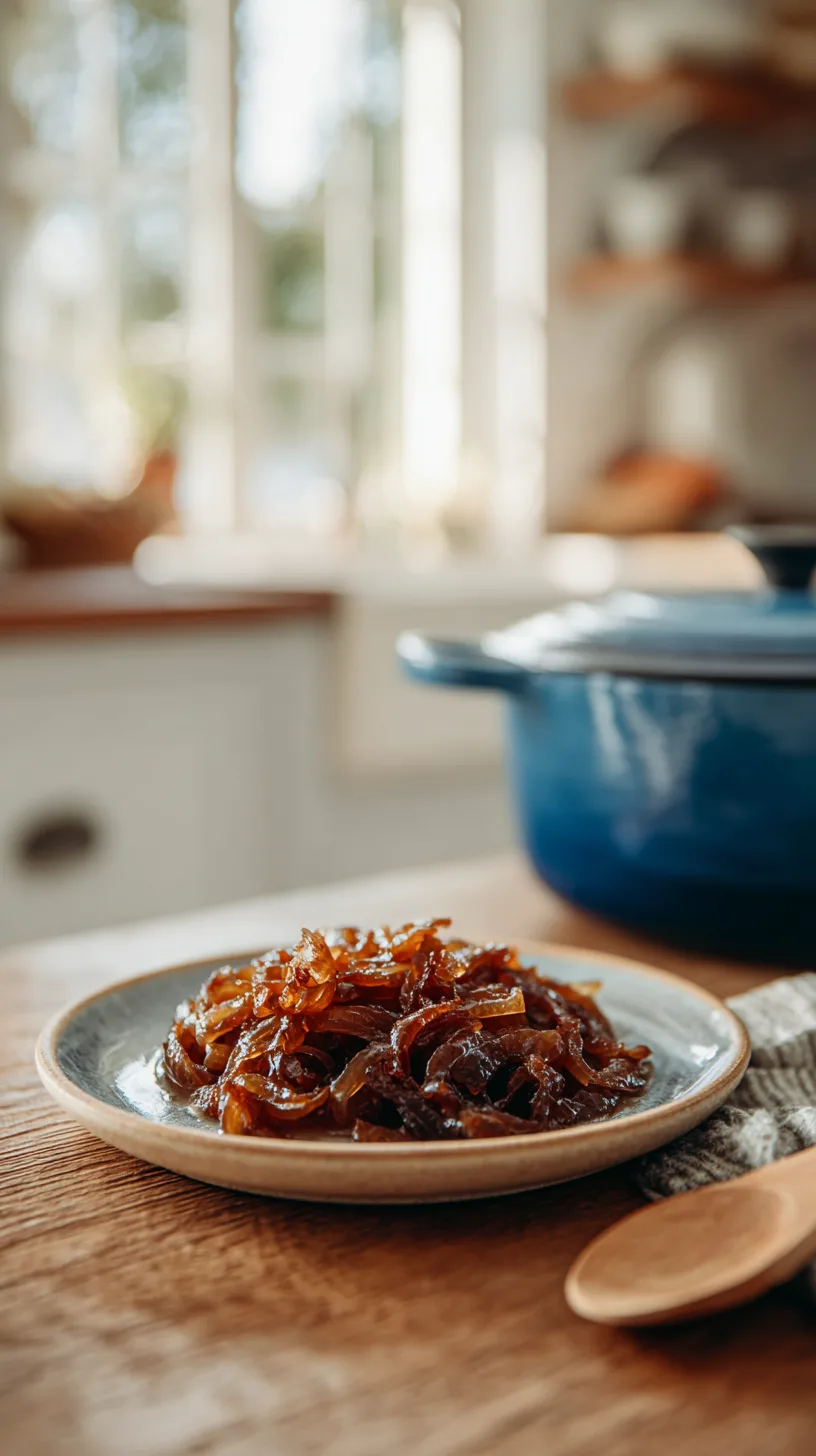
Take the pan off the heat.
Taste the onions.
They should be soft enough to almost melt on your tongue, sweet, savory, rich.
If they still have any sharpness or bitterness, they need a few more minutes. Season with a little more salt if needed.
A tiny splash of balsamic vinegar or a squeeze of lemon at the end is optional but really nice.
Common Mistakes to Avoid
Starting too low. Using low heat from the beginning means the onions sit in their own water and basically steam-stew for ages. Start with medium-high to kick-start the moisture release.
Not stirring enough early on. In the first 10 minutes especially, you need to stir regularly. Neglect the pan and the bottom layer burns while the top stays raw.
Using too small a pan. A crowded pan traps steam and slows everything down. Use the widest pan you have. More surface area = faster moisture evaporation.
Calling it done too early. Pale golden onions are not caramelized. They’re just cooked. You want deep amber, almost coffee-colored. If in doubt, keep going.
Adding too much baking soda. More is not better here. A tiny pinch does the job. Too much makes the texture weird and can add a slightly soapy aftertaste.
Pro Tips for Better Results
Add a sprig of thyme. Toss a fresh thyme sprig in during the last 10 minutes. Pull it out before serving. The flavor it adds is subtle but really good.
Deglaze with wine. White wine gives a bright, slightly acidic note that balances the sweetness. A dry sherry is even better. Use about 2 tablespoons and let it fully cook off.
Make a big batch. Caramelized onions keep beautifully in the fridge and freeze well. Cook a huge pile while you’re at it and store what you don’t use.
Use a lid for the first few minutes. Trapping steam at the very start softens the onions faster and cuts your total time by a few minutes. Remove the lid once they start to collapse.
A jar of caramelized onions in the fridge opens up a lot of weeknight options fast – including this bistro steak recipe where a spoonful of jammy onions on top turns a simple sear into something that feels like a proper restaurant plate.
Variations to Try
French Onion Style: Use beef broth for deglazing and add a splash of cognac or dry sherry toward the end. This is the base for a proper French onion soup.
Balsamic Caramelized Onions: Add 1 tablespoon of balsamic vinegar in the last 5 minutes. The vinegar reduces and coats the onions with a sticky, tangy glaze. Great on burgers and bruschetta.
Onion Jam: Cook even longer – 45 to 60 minutes – stirring less frequently and letting the onions get very dark and jammy. Add a tablespoon of brown sugar and a splash of red wine vinegar. This is a condiment, not just a topping.
Extra-Fast Method (15 Minutes): Use slightly more baking soda (still just 1/4 tsp max), higher heat, and stir almost constantly. You’ll get good color fast but the texture is softer and the flavor slightly less complex. Works great when you’re in a hurry.
If you’re building toward a full bowl, this French onion soup from scratch is the natural next step – it starts exactly where this recipe ends and takes it all the way to a proper, deeply rich finished soup.
How to Store Caramelized Onions
Let them cool completely before storing. In the fridge, they’ll keep for up to 5 days in an airtight container. In the freezer, they last 3 months easily. We like to freeze them in tablespoon-sized portions using an ice cube tray, then transfer the frozen cubes to a bag. That way you can grab exactly as much as you need.
To reheat, just toss them in a warm pan for a minute or two. No need for extra oil.
One of the best uses outside of soup and burgers is alongside potatoes – this Lyonnaise potatoes recipe is built around the combination of caramelized onions and crispy sliced potatoes, and it comes together fast once you already have a batch ready to go.
Frequently Asked Questions
With this method, about 25 minutes. The traditional low-and-slow approach takes 45 minutes to an hour. The baking soda trick and starting with higher heat shave a significant amount of time off without sacrificing quality.
Absolutely. Olive oil, avocado oil, or even coconut oil all work. Butter gives the richest flavor because of its milk solids, which brown alongside the onions. If you’re dairy-free, olive oil is our pick.
Two likely causes: your heat is too high after the initial moisture cook-off, or you’re not deglazing the pan. Once the liquid is gone and the onions are collapsing, drop the heat and add small splashes of liquid to keep things from scorching.
Yellow onions are the classic choice. They have the ideal sugar content and flavor profile. Sweet onions (Vidalia, Walla Walla) are excellent and caramelize even faster. Red onions taste great but turn an unappealing brownish-purple color.
Yes, and honestly this is the smart move. They keep for 5 days in the fridge and 3 months in the freezer. Make a big batch on the weekend and use them all week.
No. Onions have plenty of natural sugar – that’s what caramelizes. Adding sugar is actually a common shortcut that makes them sweeter but doesn’t add much depth. Skip it unless you’re making a jam or want extra sweetness for a specific recipe.
So many things. French onion soup is the classic. But they’re also incredible on burgers, flatbreads, pizza, pasta, quiche, grilled cheese, grain bowls, and scrambled eggs. Once you have a jar of them in the fridge, you’ll find yourself putting them on everything.
Related Recipes
Once you have a batch of caramelized onions ready, the obvious place to take them is French onion soup from scratch. That recipe is essentially built around everything you just made – the onions are the soul of it, and starting with a properly caramelized batch makes every difference in the final bowl.
If dinner needs to come together fast, spoon a generous amount over this bistro steak right after it comes off the heat. The onions melt into the resting juices and turn a simple weeknight sear into something that genuinely tastes like a restaurant plate without any extra effort.
For burgers, this A1 burger recipe is exactly the kind of build where caramelized onions earn their place. The bold, savory profile of the burger needs that sweetness and depth to balance it, and a jar of these in the fridge means you’re always thirty seconds away from the best burger topping on the table.
The French have been pairing caramelized onions with potatoes for a long time for good reason – this Lyonnaise potatoes recipe puts both in the same pan and lets them finish together. It’s one of those side dishes that looks impressive and takes almost no effort once you already have the onions done.
On a night when you want something slow and deeply satisfying, fold a few spoonfuls into the base of this short rib ragu with pappardelle before it braises. They disappear into the sauce completely but add a layer of sweetness that makes the whole thing taste like it cooked for twice as long as it did.
The same low-heat patience that makes caramelized onions work is exactly what drives a good mushroom risotto. Stir a spoonful into the finished pot right before serving and the sweetness of the onions rounds out the earthiness of the mushrooms in a way that’s hard to explain until you try it.
And if there’s a grilled cheese in your near future, this spicy pickle grilled cheese is the one to make. Tuck a layer of caramelized onions inside before it hits the pan and the sweet-savory contrast against the pickles and melted cheese is genuinely one of the better things you can do with ten minutes and a good skillet.
THE FINAL BITE
Caramelized onions don’t announce themselves.
They just make everything around them better – the burger, the pasta, the bowl of soup on a Tuesday night.
Get this technique into your regular rotation and you’ll reach for it constantly without even thinking about it.
Ryan Yates shares that same kind of quiet, practical kitchen knowledge every week in the Simply Delicious Digest by Savore Media.
Twenty years behind commercial kitchen lines, written for the home cook who just wants things to actually work.
Worth a spot in your inbox.
Disclosure: Every guide here is written and tested by Ryan Yates, a Le Cordon Bleu-trained chef with more than 20 years in professional kitchens. Editorial tools help with formatting and structure. This post may contain affiliate links — if you buy through one we may earn a small commission, at no extra cost to you.