Master the Sauté Cooking Method for Perfectly Cooked Dishes
Tired of bland, uninspiring meals? Want to unleash your inner chef and create restaurant-quality dishes at home? Look no further! The sauté cooking method is your secret weapon for transforming ordinary ingredients into extraordinary culinary masterpieces.
In this comprehensive guide, we’ll dive deep into the art of sautéing, unveiling the techniques, tips, and tricks that will elevate your cooking game to new heights. Get ready to sizzle, sear, and savor your way to delicious perfection!
- The Sizzling Secrets of Sauté – Unveiling the Culinary Magic
- The Pan Plan: Choosing Your Sauté Sidekick
- Our Best Picks for Sauté Pans
- Prep Like a Pro: Setting the Stage for Sauté Success
- The Main Event: Sauté in Action
- The Flavor Finale: Seasoning Like a Pro
- Nutritional Nuggets: The Health Benefits of Sautéing
- Ingredient Alternatives: Sauté for Every Diet
- The Cool Down: Post-Sauté Care
- Cleaning Up: The After-Party
- Troubleshooting Your Sauté: When Good Pans Go Bad
- Sauté Sensations: Recipe Ideas to Get You Started
- The Grand Finale: Your Sauté Mastery Awaits
- FAQs: Your Burning Sauté Questions Answered
- The Sauté Sensation: Your Journey to Culinary Excellence
- Cheat Sheet To Sauté success!
- Check Out More Cooking Methods
The Sizzling Secrets of Sauté – Unveiling the Culinary Magic

Picture this: A hot pan, a splash of oil, and the tantalizing aroma of ingredients transforming before your eyes. That’s the magic of sautéing, a cooking technique that’s as versatile as it is delicious. But what exactly is sautéing, and why should you care?
Sautéing is like the cool kid of the culinary world – quick, efficient, and always ready to party with your taste buds. It involves cooking food quickly in a small amount of fat over high heat, creating a perfect balance of flavor and texture. Think of it as the Goldilocks of cooking methods – not too much fat, not too little heat, but just right for creating that perfect golden-brown sear and developing rich, complex flavors.
But here’s the kicker: Sautéing isn’t just for fancy chefs in high-end restaurants. In fact, over 75% of dinners whipped up in American homes involve this nifty technique. Whether you’re a kitchen newbie or a seasoned home cook, mastering the art of sauté will revolutionize your culinary repertoire.
The Pan Plan: Choosing Your Sauté Sidekick

Before we jump into the sizzling action, let’s talk pans. Not all heroes wear capes, and not all pans are created equal. For sauté success, you’ll want a pan that’s as steady as a rock and as hot as your mixtape. Here’s what to look for:
- Heavy Base: This is non-negotiable. A heavy base distributes heat evenly, preventing hot spots that can lead to uneven cooking. It’s like having a reliable dance partner – it keeps everything moving smoothly.
- Low Sides: We’re not building walls here; we’re creating flavor. Low sides allow moisture to escape, giving you that perfect golden-brown sear instead of a soggy mess. It’s not rocket science, but it is delicious science.
- Material Matters: Stainless steel and anodized aluminum are your new best friends. They can handle high heat like a champ and won’t react with acidic ingredients. If you’re feeling fancy, copper pans are the Ferraris of the sauté world – they respond to temperature changes faster than you can say “Bon appétit!”
- Size Matters: Choose a pan that’s big enough to give your ingredients some personal space. Overcrowding leads to steaming, not sautéing. It’s like hosting a party – you don’t want it to be too crowded, right?
Pro Tip: Invest in a high-quality sauté pan. It might seem pricey upfront, but it’ll be your faithful kitchen companion for years to come. Think of it as a long-term relationship with deliciousness.
Our Best Picks for Sauté Pans
Looking for the perfect sauté pan? Here are our top four picks, combining quality, durability, and value to help you create delicious meals at home.

All-Clad Stainless Steel Tri-Ply Bonded Sauté Pan
Material: Stainless Steel
Size: 4 qt
Features: Tri-ply construction, oven safe up to 600°F, dishwasher safe
Price: $$
Buy on Amazon
Cuisinart Chef’s Classic Nonstick Hard-Anodized Sauté Pan
Material: Hard-Anodized Aluminum
Size: 5.5 qt
Features: Nonstick interior, cool grip handle, oven safe up to 500°F
Price: $
Buy on Amazon
Mauviel M’Heritage Copper Sauté Pan
Material: Copper & Stainless Steel
Size: 3.2 qt
Features: Rapid heat conductivity, riveted handles, stainless steel interior
Price: $$$$
Buy on Amazon
GreenPan Valencia Pro Ceramic Nonstick Sauté Pan
Material: Ceramic Nonstick
Size: 4 qt
Features: PFAS-free nonstick, induction compatible, oven safe up to 600°F
Price: $$
Buy on AmazonAffiliate Disclosure: This table contains affiliate links, meaning we may earn a small commission if you purchase through these links at no additional cost to you. This helps support our work and allows us to continue providing you with high-quality recommendations.
Prep Like a Pro: Setting the Stage for Sauté Success
Now that you’ve got your pan picked out, it’s time to prep your ingredients. This is where the magic begins, folks. You want your ingredients to be uniform – think of them as a culinary boy band, all in sync and ready to perform.
- Chop Like a Boss: Cut your ingredients into uniform pieces. This isn’t just for looks – it ensures everything cooks evenly. No one wants a dish that’s part raw, part charcoal. Aim for pieces about 1/4 to 1/2 inch in size for most vegetables and meats.
- Dry It Out: Here’s a pro tip – pat your ingredients dry before they hit the pan. Why? Because moisture is the enemy of a good sear. You want to sauté, not steam! Use paper towels to blot excess moisture from meats and vegetables.
- Temperature Matters: For meats, let them come to room temperature before cooking. This ensures even cooking and a better sear. Take them out of the fridge about 30 minutes before you plan to start cooking.
- Seasoning Station: Season your ingredients before they hit the pan. Salt and pepper are your baseline, but don’t be afraid to get creative with herbs and spices. Just remember, you can always add more seasoning later, but you can’t take it away.
- Mise en Place: This fancy French term just means “everything in its place.” Have all your ingredients prepped and ready to go before you start cooking. Sautéing moves fast, and you don’t want to be scrambling for ingredients mid-cook.
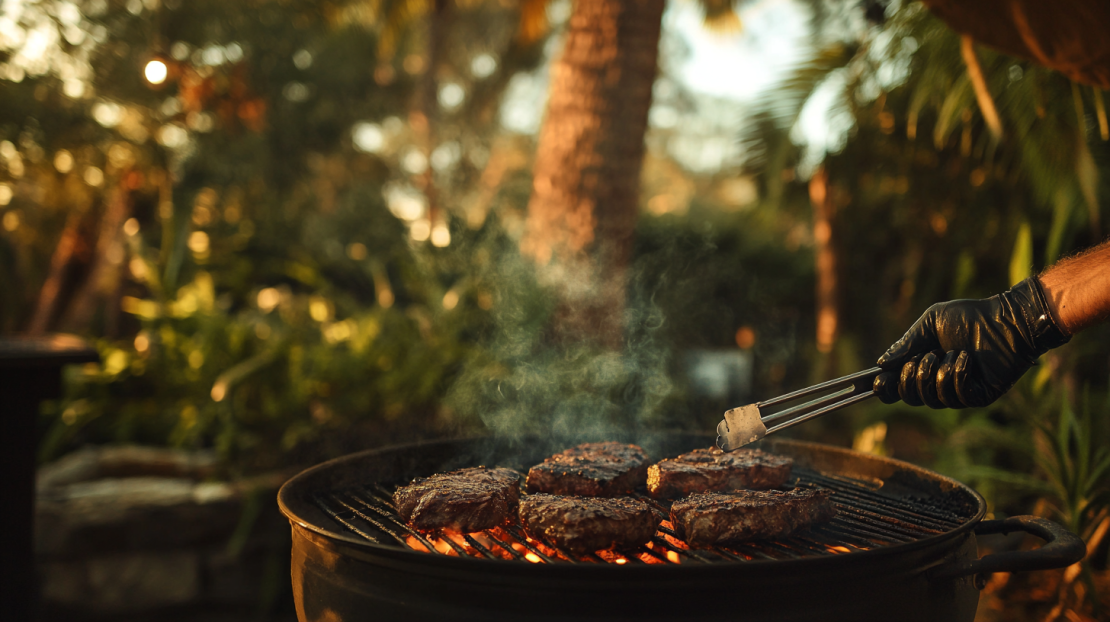
The Main Event: Sauté in Action

Alright, folks, it’s showtime! Here’s how to make your ingredients dance in that pan:
- Heat It Up: Start with a hot pan. How hot? If a drop of water does the cha-cha across the surface, you’re in business. Medium-high heat is usually your sweet spot. Give your pan a minute or two to heat up evenly.
- Fat’s Where It’s At: Add your chosen fat – oil, butter, or ghee. Each has its own personality:
- Oils (like vegetable, canola, or grapeseed) are great for higher heat and a neutral flavor.
- Butter brings richness but can burn easily. Try clarified butter or ghee for higher heat tolerance.
- Olive oil adds flavor but has a lower smoke point. Save it for lower-heat sautéing or finishing dishes. Use just enough fat to lightly coat the bottom of the pan – we’re sautéing, not deep-frying!
- The Grand Entrance: Add your ingredients to the pan. For meats, place them in a single layer and don’t touch them for a minute or two. This allows a nice crust to form. For vegetables, add them all at once and get ready to move!
- Keep It Moving: Stir or toss regularly. It’s part cooking, part performance art. This ensures even cooking and prevents sticking. For delicate items like fish, a gentle stir will do. But for heartier fare? Channel your inner chef and give that pan a flip!
- Don’t Overcrowd: Give your food some personal space. Overcrowding leads to steaming, not sautéing. If needed, cook in batches. It’s like hosting a party – you don’t want it to be too crowded, right?
- Timing Is Everything: Most firm veggies take about 5-7 minutes to sauté. Meats vary, so use a digital thermometer to check for doneness. It’s like a backstage pass to perfectly cooked food.
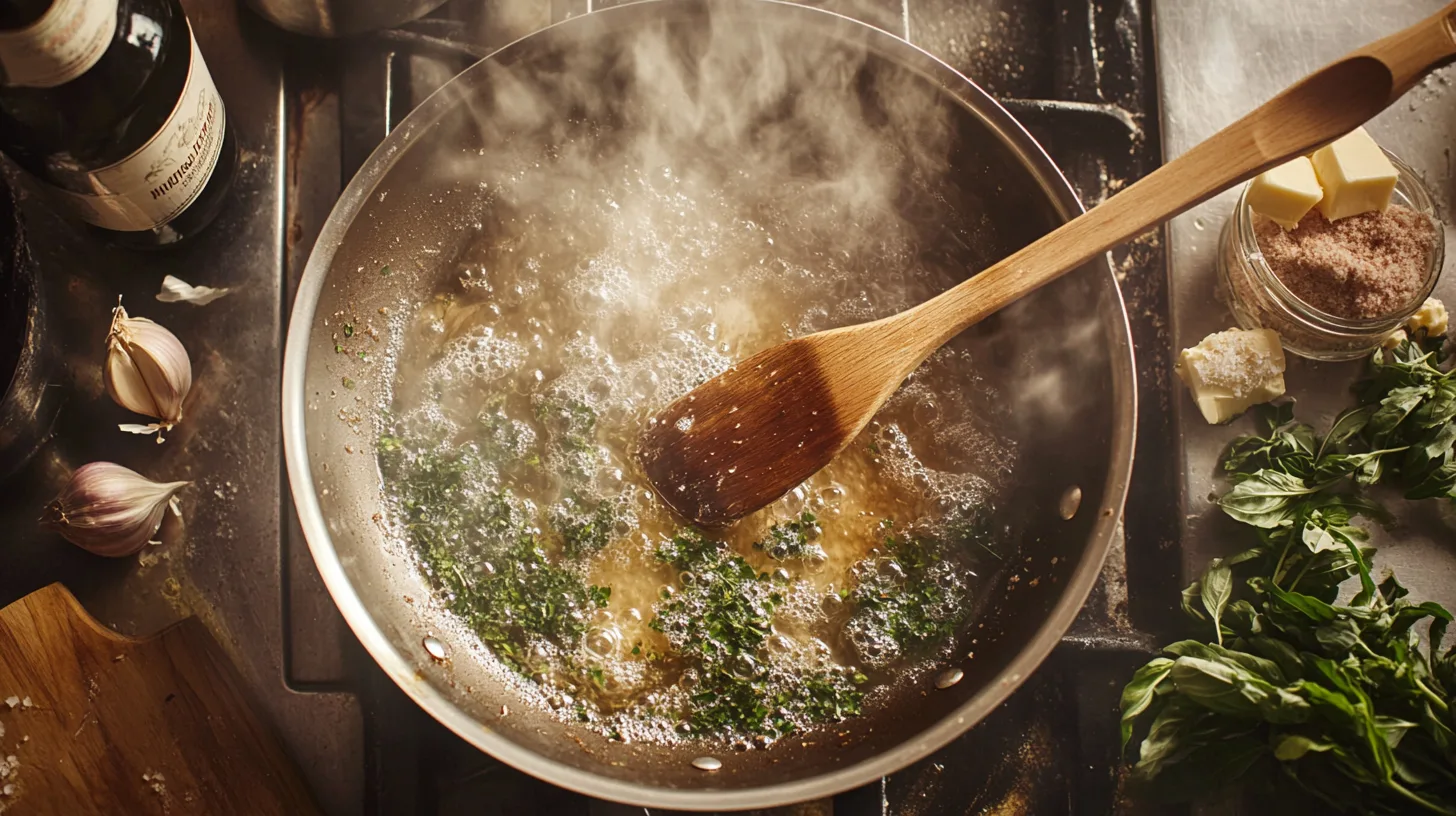
- Finish Strong: For an extra burst of flavor, deglaze the pan with a splash of wine, stock, or even water. This lifts all those delicious browned bits (called fond) from the bottom of the pan and creates an instant sauce.
The Flavor Finale: Seasoning Like a Pro

Herbs and spices are the backup singers of your sauté – they might not be the lead, but boy, do they make the performance shine. Here’s how to use them:
- Dried Spices: Throw them in early to let them warm up and release their flavors. Add them to the oil before your main ingredients for maximum impact.
- Fresh Herbs: Save them for the encore – a sprinkle right at the end adds that perfect pop of freshness. Delicate herbs like basil, cilantro, and parsley are best added off the heat.
- Garlic and Ginger: These flavor powerhouses can burn easily. Add them towards the end of cooking for the best flavor without bitterness.
- Salt and Pepper: Don’t forget to season as you go. A little salt during cooking helps bring out the natural flavors of your ingredients.
Nutritional Nuggets: The Health Benefits of Sautéing
Sautéing isn’t just delicious – it can be a healthy cooking method too! Here’s why:
- Less Fat: Compared to deep-frying, sautéing uses much less oil, reducing overall fat content.
- Nutrient Retention: The quick cooking time helps preserve vitamins and minerals that can be lost with longer cooking methods.
- Flavor Without Extras: The high heat caramelization creates complex flavors without the need for heavy sauces or added fats.
- Versatility: Sautéing works well with lean proteins and a wide variety of vegetables, making it easy to create balanced, nutritious meals.
To maximize the health benefits, try these tips:
- Use heart-healthy oils like olive oil or avocado oil.
- Load up on colorful vegetables – the more variety, the better!
- Choose lean proteins like chicken breast, fish, or tofu.
- Experiment with whole grains like quinoa or brown rice as a base for your sautéed creations.
Ingredient Alternatives: Sauté for Every Diet
Don’t let dietary restrictions stop you from sautéing! Here are some alternatives for common ingredients:
- Oil Alternatives: If you’re watching your fat intake, try sautéing in low-sodium broth or a small amount of water. You’ll still get great flavor without the added calories.
- Gluten-Free Options: Many sauté recipes are naturally gluten-free. For thickening sauces, use cornstarch or arrowroot instead of flour.
- Vegan Varieties: Replace meat with firm tofu, tempeh, or seitan. These plant-based proteins sauté beautifully and absorb flavors well.
- Low-Carb Swaps: Instead of serving your sauté over rice or pasta, try cauliflower rice or zucchini noodles for a low-carb alternative.
- Allergy-Friendly: If you’re cooking for someone with allergies, be mindful of common allergens like nuts, soy, or dairy. There are usually safe alternatives available.
The Cool Down: Post-Sauté Care
You’ve nailed the sauté, but we’re not done yet:
- Drain Excess: If needed, pour your sautéed goodies onto a clean kitchen towel or paper towel to remove any excess oil. It’s like a mini spa treatment for your food.
- Rest and Serve: Give your dish a moment to rest, especially for meats. It allows the flavors to settle and ensures you’re not serving mouth-burning lava on a plate.
- Garnish with Gusto: A sprinkle of fresh herbs, a squeeze of lemon, or a dusting of grated cheese can take your sautéed dish from great to extraordinary.
Cleaning Up: The After-Party
The show’s over, the audience (your taste buds) are satisfied, but the work isn’t quite done. Treat your pans right, and they’ll be faithful companions for years to come.
- Cool It Down: Let your pan cool slightly before cleaning. Plunging a hot pan into cold water can cause warping.
- Soak Away: For stubborn bits, fill the pan with warm, soapy water and let it soak for a few minutes.
- Gentle Scrubbing: For non-stick surfaces, a soft sponge is all you need. Stainless steel can take a bit more elbow grease, but avoid abrasive scrubbers – they’re the enemy of good cookware.
- Dry Thoroughly: Water is the arch-nemesis of many pans, especially cast iron. Dry your pan completely to prevent rust and maintain its seasoning.
- Storage Smarts: Store your pans in a dry place. If you stack them, place a soft cloth between each pan to prevent scratches.
Troubleshooting Your Sauté: When Good Pans Go Bad
Even the best chefs have off days. Here’s how to troubleshoot common sauté issues:
- Food Sticking: Your pan probably wasn’t hot enough when you added the food. Next time, let the pan heat up fully before adding oil and ingredients.
- Uneven Cooking: This could be due to overcrowding or uneven heat distribution. Cook in batches and make sure your pan is high-quality with a heavy bottom.
- Burning: Your heat is too high or you’re cooking for too long. Adjust your temperature and keep a closer eye on your food.
- Soggy Instead of Crispy: You might be overcrowding the pan or your ingredients might be too wet. Give your food more space and pat ingredients dry before cooking.
- Lack of Flavor: Don’t be shy with seasonings! Also, make sure you’re letting a good crust form before stirring – that’s where a lot of flavor develops.
Sauté Sensations: Recipe Ideas to Get You Started
Ready to put your new skills to the test? Here are some sauté-inspired recipes to try:
- Garlic Butter Shrimp Sauté: Quick, easy, and oh-so-delicious. Perfect for a weeknight dinner or impressive appetizer.
- Colorful Vegetable Medley: A rainbow of bell peppers, zucchini, and carrots sautéed to crisp-tender perfection.
- Chicken and Mushroom Sauté: A classic combination elevated with a touch of thyme and a splash of white wine.
- Tofu and Bok Choy Stir-Fry: A vegan-friendly dish that proves sautéing isn’t just for meat-eaters.
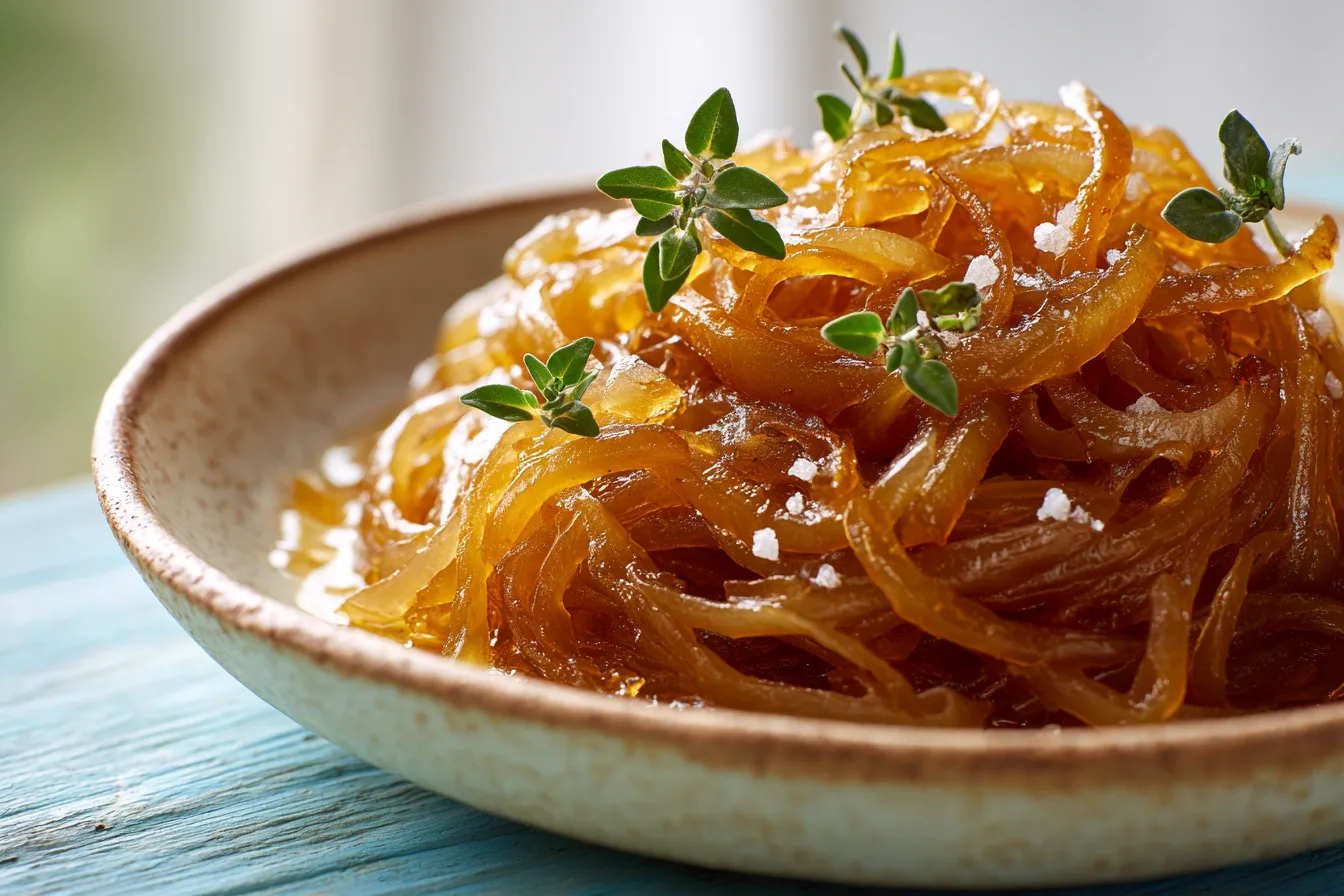
- Sautéed Apples: A sweet treat that shows sautéing works for dessert too! Serve over ice cream for an indulgent finish to your meal.
The Grand Finale: Your Sauté Mastery Awaits
And there you have it, folks – your crash course in sauté mastery. From picking the perfect pan to flipping like a pro, you’re now armed with the knowledge to turn any ingredient into a star. Remember, sautéing is all about the balance between heat, fat, and timing. It’s a dance of flavors and textures that, with practice, you’ll master in no time.
So fire up that stove, grab your favorite veggies or meats, and get ready to dance your way to deliciousness. Who knows? With these skills, you might just sauté your way to becoming the next culinary sensation. Now, get out there and make those pans sizzle!
FAQs: Your Burning Sauté Questions Answered
While both methods use high heat and quick cooking, sautéing typically uses less oil and involves less constant stirring than stir-frying. Sautéed foods are usually cooked in a single layer, while stir-frying often involves cooking larger quantities of food in a wok.
Yes! You can sauté using a small amount of broth, water, or even wine. This technique, often called “water sautéing,” is great for low-fat cooking. Just be prepared to add more liquid as it evaporates.
For high-heat sautéing, choose oils with high smoke points like vegetable, canola, or grapeseed oil. For lower heat or finishing dishes, extra virgin olive oil adds great flavor.
Garlic burns easily due to its high sugar content. Add it towards the end of cooking or sauté it at a lower temperature. You can also add it with some liquid to prevent burning.
While fresh is best for sautéing, you can use frozen veggies in a pinch. Just be aware that they’ll release more moisture as they cook, which can affect the texture of your dish.
The best way is to use a meat thermometer. For chicken, aim for 165°F (74°C) at the thickest part. For beef, it depends on your preferred doneness – 145°F (63°C) for medium-rare, up to 170°F (77°C) for well-done.
Add wine after your main ingredients have cooked and developed some color. Pour it into the hot pan and let it simmer for a minute or two to burn off the alcohol and concentrate the flavors. This technique, called deglazing, also helps lift any flavorful browned bits from the bottom of the pan.
The Sauté Sensation: Your Journey to Culinary Excellence
Congratulations! You’ve just completed your crash course in the art of sautéing. From choosing the perfect pan to mastering the delicate dance of heat and ingredients, you’re now equipped with the knowledge to transform simple ingredients into culinary masterpieces.
Remember, like any skill, sautéing improves with practice. Don’t be discouraged if your first few attempts aren’t perfect – even professional chefs had to start somewhere. The key is to keep experimenting, tasting, and most importantly, enjoying the process.
As you continue your culinary journey, keep these key takeaways in mind:
Quality Matters: Invest in a good sauté pan and high-quality ingredients. They’re the foundation of great sautéed dishes.
Prep is Key: Proper preparation sets you up for success. Take the time to chop, dry, and season your ingredients before they hit the pan.
Heat Management: Finding the right balance of heat is crucial. Too low, and you’ll steam instead of sauté. Too high, and you risk burning.
Keep it Moving: Regular stirring or tossing ensures even cooking and prevents sticking.
Trust Your Senses: Use your eyes, nose, and ears as you cook. The sizzle of the pan, the aroma of the ingredients, and the color of your food are all indicators of how your dish is progressing.
Experiment and Have Fun: Don’t be afraid to try new ingredient combinations or techniques. Some of the best culinary discoveries happen by accident!
With these skills in your culinary toolkit, you’re well on your way to becoming a sauté sensation. Whether you’re whipping up a quick weeknight dinner or impressing guests with a gourmet meal, the versatile sauté method will serve you well.
So, what are you waiting for? Grab that pan, fire up the stove, and let your culinary creativity shine. Your taste buds (and lucky dinner guests) will thank you. Happy sautéing, and bon appétit!
Cheat Sheet To Sauté success!
What is Sautéing?
- Quick Cooking: Small amount of fat over high heat.
- Flavor & Texture: Aim for a golden-brown sear.
- Balanced Cooking: Not too much fat or too little heat.
Choosing a Pan
- Heavy Base: Even heat, no hot spots.
- Low Sides: Let moisture escape for better sear.
- Material: Stainless steel, anodized aluminum, copper.
- Size Matters: Avoid overcrowding for best results.
Prepping Ingredients
- Uniform Size: Even cooking (1/4 to 1/2 inch pieces).
- Dry Ingredients: Pat dry to avoid steaming.
- Seasoning: Salt, pepper, and get creative with spices.
- Mise en Place: Have everything ready before cooking.
Sautéing Technique
- Heat the Pan: Medium-high heat (hot enough for water to sizzle).
- Add Fat: Lightly coat the pan with oil, butter, or ghee.
- Add Ingredients: Cook in batches if necessary; don’t overcrowd.
- Keep It Moving: Stir or toss regularly for even cooking.
Finishing Touches
- Deglaze: Add wine, stock, or water to lift browned bits.
- Final Seasoning: Fresh herbs, extra seasoning at the end.
Health Benefits
- Less Fat: Uses less oil than frying.
- Nutrient Retention: Quick cooking preserves vitamins.
- Flavorful: High heat adds flavor without heavy sauces.
Dietary Alternatives
- Low-Fat: Sauté with broth or water.
- Gluten-Free: Use cornstarch or arrowroot for thickening.
- Vegan: Sauté tofu, tempeh, or seitan instead of meat.
- Low-Carb: Use cauliflower rice or zucchini noodles.
Post-Sauté Care
- Drain Excess: Use paper towels to remove excess oil.
- Cool & Clean: Let the pan cool before cleaning.
- Storage: Store pans dry, place a cloth between stacked pans.
Troubleshooting
- Food Sticking: Pan wasn’t hot enough or ingredients were too wet.
- Uneven Cooking: Avoid overcrowding; cook in batches.
- Burning: Lower heat or reduce cooking time.
- Soggy Food: Dry ingredients and don’t overcrowd.
- Lack of Flavor: Season throughout cooking and let a crust form.