Make-Ahead Turkey Gravy That Holds Its Texture From Freezer to Table
Gravy made three weeks early fails in one of two ways. It thaws thin, with a cloudy ring of water separating out around the edge of the container. Or it reheats into something closer to wallpaper paste, thick enough to hold a spoon upright. Neither is a seasoning problem. Both trace back to which starch went into the pot and how the gravy came down in temperature afterward. Build the base on roasted turkey wings, thicken it with the fat you skim off that stock, and it will come back from the freezer with its body intact. Six cups, finished in advance, freeing up the roasting pan during the twenty minutes when nobody in the kitchen has a spare hand.
Why Gravy Breaks Between the Freezer and the Table
Starch granules swell and burst when you cook them in liquid. That’s thickening. What happens next depends on the starch.
Cornstarch is almost pure amylopectin and amylose with no protein structure around it. Freeze a cornstarch-thickened sauce and the water inside forms ice crystals that push the starch molecules together. On thawing, those molecules have realigned into tighter chains and can no longer hold the water they were suspended in. The water leaves. That’s the puddle. Whisking will not put it back, because the gel structure itself has collapsed.
Wheat flour behaves differently. Alongside its starch it carries protein and pentosans, and those hold water independently of the starch gel. A flour-thickened gravy will still look slightly broken coming out of the freezer. Whisk it over gentle heat for ninety seconds and it pulls back together.
The second variable is cooling speed. Gravy left in a deep container on the counter sits in the range where starch retrogrades slowly and bacteria move quickly. Spread it shallow, chill it hard, and both problems shrink.
Print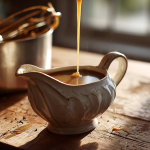
Make Ahead Turkey Gravy
- Prep Time: 20 minutes
- Chill Time: 8 hours (overnight, for fat separation)
- Cook Time: 3 hours
- Total Time: 11 hours 20 minutes
- Yield: 12 (1/2 cup each) 1x
- Category: Sauce
- Method: Stovetop
- Cuisine: American, Holiday
Description
A gravy built on roasted turkey wings and thickened with the fat skimmed off its own stock, so it survives freezing and reheats without separating. Season it to about eighty percent and finish with roasting-pan drippings on the day. Makes six cups.
Equipment Needed
Rimmed sheet pan, 8-quart stockpot, fine-mesh strainer, heavy-bottomed 4-quart saucepan, flat whisk, fat separator (optional but useful on serving day)
Ingredients
For the stock
- 3 lb turkey wings (about 3 wings), split at the joints
- 1 tbsp neutral oil
- 1 large yellow onion, quartered
- 2 medium carrots, cut in thirds
- 2 celery ribs, cut in thirds
- 8 sprigs fresh thyme
- 2 bay leaves
- 1 tsp black peppercorns
- 11 cups cold water, divided
For the gravy
- 10 tbsp reserved turkey fat, skimmed from the chilled stock
- 10 tbsp all-purpose flour
- 6 cups strained turkey stock, warm
- 1 tbsp soy sauce or tamari
- 2 tsp sherry vinegar
- Kosher salt
- Freshly ground black pepper
For finishing on serving day
- 1/2 to 1 cup defatted roasting-pan drippings, strained
Instructions
- Heat the oven to 425°F. Toss the turkey wings with the oil on a rimmed sheet pan in a single layer. Roast 35 minutes.
- Add the onion, carrot, and celery to the pan. Roast 20 minutes more, until the wing skin is deep brown and the pan bottom is streaked with stuck-on fond.
- Transfer the wings and vegetables to a stockpot. Set the sheet pan over a burner on medium, add 1 cup water, and scrape the fond loose with a wooden spoon while it steams. Pour all of it into the pot.
- Add the remaining 10 cups water, thyme, bay leaves, and peppercorns. Bring to a bare simmer, with bubbles breaking the surface only occasionally. Skim the foam that rises in the first 15 minutes.
- Simmer uncovered 2 hours, never letting it reach a rolling boil. The stock should reduce to roughly 7 cups.
- Strain through a fine-mesh strainer into a bowl. Discard the solids. Refrigerate uncovered until cold, then cover. Overnight is best.
- Lift the set fat cap off the surface. Reserve 10 tablespoons of that fat. The stock underneath should jiggle like loose gelatin when you shake the bowl.
- Warm 6 cups of the stock in a saucepan to a simmer. Reserve the rest for thinning later.
- Melt the turkey fat in a heavy 4-quart saucepan over medium heat. Whisk in the flour and cook 4 to 5 minutes, whisking constantly, until the roux is the color of peanut butter and smells nutty.
- Add the hot stock in three additions, whisking each one fully smooth before the next. Bring to a low bubble and cook 10 minutes, whisking often, until the gravy coats a spoon and holds a line when you draw a finger through it.
- Off the heat, whisk in the soy sauce and sherry vinegar. Season with salt and pepper to about eighty percent of where you want it, so the drippings have room later.
- Pour into a shallow pan to cool fast, below 40°F within 2 hours. Portion into 2-cup containers. Refrigerate up to 4 days or freeze up to 3 months.
- To serve: thaw overnight in the refrigerator. Reheat over medium-low with a flat whisk. It will look separated for the first minute. Keep whisking. Thin with warm reserved stock as needed.
- Pour the roasting-pan drippings into a fat separator, discard the fat, and strain. Whisk into the warm gravy a half cup at a time, tasting between additions. Adjust salt last.
Notes
I build the roux with fat skimmed off the chilled stock rather than butter. Butter is roughly 80% fat and 16% water, so a cup measured against a cup of flour leaves the flour under-coated and prone to clumping, and the water has to boil off before the roux develops at all. Skimmed turkey fat is pure fat. It coats every flour particle, which is what prevents lumps, and it carries the roasted flavor of the wings into the thickener instead of layering a dairy note over it.
I ran the same stock two ways. The cornstarch-thickened batch looked correct going into the freezer and came out weeping, a ring of water around a gravy that had lost its structure. The flour batch from identical stock came back cloudy for about ninety seconds on the stove and whisked smooth. The thickener you choose is a storage decision before it is a texture one, and no recipe I found said so.
Roast the Wings Before You Simmer Them
Turkey wings simmered raw give you a pale, gelatinous stock with very little flavor above the collagen. Roast them at 425°F until the skin is deep brown and the pan bottom is streaked with stuck-on fond, and you are working with a completely different ingredient. That browning is Maillard chemistry: amino acids and reducing sugars reorganizing into hundreds of new aromatic compounds that raw simmering cannot produce at any temperature.
The fond on the sheet pan is the concentrated version of that. Pour a cup of water onto the hot pan, scrape it with a wooden spoon while it steams, and add every bit of it to the stockpot. Skipping that step throws out the most flavorful thing you made.
Keep the stock at a bare simmer, never a rolling boil. Hard boiling drives fat into the liquid as an emulsion, which clouds the stock and, more practically, means less fat rises to the top overnight. You want that fat. It’s the thickener.
Build the Roux With Turkey Fat, Not Butter
Here’s the technique choice I make every time, and the reasoning behind it. Butter is roughly 80% fat and 16% water. Measure a cup of butter against a cup of flour and the flour is under-fatted, so it clumps instead of coating, and the water has to cook off before the roux starts developing at all. Fat skimmed off chilled turkey stock is pure fat. It coats every flour particle completely, which is what prevents lumps in the first place, and it carries the roasted flavor of the wings straight into the thickener rather than layering a dairy note on top of it.
Cook the roux to the color of peanut butter, four or five minutes over medium heat, whisking the whole time. Blond roux thickens more powerfully than dark roux because prolonged heat breaks starch chains into shorter fragments with less thickening capacity. Go darker for flavor and you’ll need more flour to hit the same body.
Add the hot stock in three additions. Cold stock into hot roux seizes the starch before it disperses, and that’s where lumps come from.
Be sure to combine this gravy with a quick and easy turkey roast. Sometimes, the holidays get away from you and turning out a delicious Butter Ball Turkey is the way to go.
What the Starch Does Between Freezing and Serving
I ran the same stock two ways to check this. The cornstarch batch looked correct going into the freezer and came out weeping, a thin ring of water around a gravy that had lost its structure entirely. The flour batch from the identical stock came back cloudy for about ninety seconds on the stove and then whisked smooth. What nobody mentions is that your thickener choice is a storage decision before it’s a texture one.
Practical windows: four days refrigerated, three months frozen in two-cup portions. Portion it small. A gallon container of gravy takes most of a day to thaw and reheats unevenly, with the outside overcooking before the center is warm.
Thaw overnight in the refrigerator, then reheat over medium-low with a flat whisk. It will look wrong for a moment. Keep whisking. If it needs thinning, use warm stock rather than water, because water dilutes the seasoning you already balanced. I keep two cups of the original stock frozen alongside every batch for exactly this. That kind of make-ahead sequencing is most of what I write about in the Simply Delicious Digest, and gravy is the clearest example of it paying off.
Marrying the Base With Roasting-Day Drippings
This is where make-ahead gravy usually goes wrong on the day, and it’s a salt problem.
The drippings from a brined or salted bird are concentrated, and your base is already seasoned. Pour the pan contents into a fat separator or a glass measuring cup, let it settle for five minutes, and pour off the clear fat from the top. Strain what’s left. Then add it to the warm gravy a half cup at a time, tasting between additions.
If the drippings taste aggressively salty on their own, use less and accept it. A gravy that tastes correct with three-quarters of the drippings in it is finished. Under-season the base deliberately for this reason: you can always add salt at the end, and you cannot take it out.
Season the base to about eighty percent of where you want it. The drippings are the last twenty, and you don’t know how salty they’ll be until the bird comes out.
Holding Gravy for a Crowd Without Wrecking It
Anyone who has cooked for hundreds knows gravy is a hold-time problem more than a cooking problem. Two things happen while it sits.
Water evaporates, so the gravy tightens. Check it every thirty minutes and whisk in warm stock a few tablespoons at a time. Second, a skin forms as surface proteins and starch dry out. Press plastic wrap directly onto the surface, or float a thin slick of melted butter across the top and whisk it in before serving.
Hold at 145°F or above in a covered pot over the lowest burner setting, or in a slow cooker on warm. Below that you’re in the temperature range where bacterial growth accelerates, and gravy is a low-acid, protein-rich medium that supports it well.
For all your Thanksgiving culinary adventures, check out our Thanksgiving Holiday recipes.
Troubleshooting
- Lumps. Push it through a fine-mesh strainer. Immersion blenders work but tend to over-emulsify and dull the color.
- Too thin after reheating. Whisk one tablespoon of flour into two tablespoons of softened butter, drop it into the simmering gravy, and cook three minutes.
- Greasy sheen on top. The stock was boiled too hard. Skim with a ladle, or lay a paper towel flat on the surface and lift it away.
- Flat, one-note. A teaspoon of sherry vinegar off heat sharpens everything. Soy sauce adds glutamates and depth without reading as soy.
Variations
- Gluten-free. Sweet rice flour makes the most stable freezer roux of the alternatives. Use the same volume as wheat flour and cook the roux two minutes only.
- Giblet. Simmer the neck and gizzard with the stock, chop fine, fold in during the last five minutes of reheating.
- Herb-forward. Steep two sage sprigs in the finished gravy for ten minutes, then pull them. Sage turns bitter if it stays in through storage.
Make it the weekend before. Freeze it flat in quart bags, stack them, and forget about them until Wednesday. The only thing left to do on the day is pour the drippings in and taste.
Written by Ryan Yates — Executive Chef with 20+ years in commercial kitchens and the culinary voice behind Simply Cooking Recipes.
This article uses automation for structure, but all insights and advice are provided by Ryan Yates, an experienced executive chef with over 20 years of expertise.
Disclosure: Every recipe here is developed and tested by Ryan Yates, a Le Cordon Bleu-trained chef with more than 20 years in professional kitchens. Editorial tools help with formatting and structure. This post may contain affiliate links — if you buy through one we may earn a small commission, at no extra cost to you.