Sous Vide Secrets! How To Sous Vide Without A Machine At Home
Ever heard of sous vide and thought, “Sounds delicious, but I don’t have hundreds to spend on another kitchen appliance”?
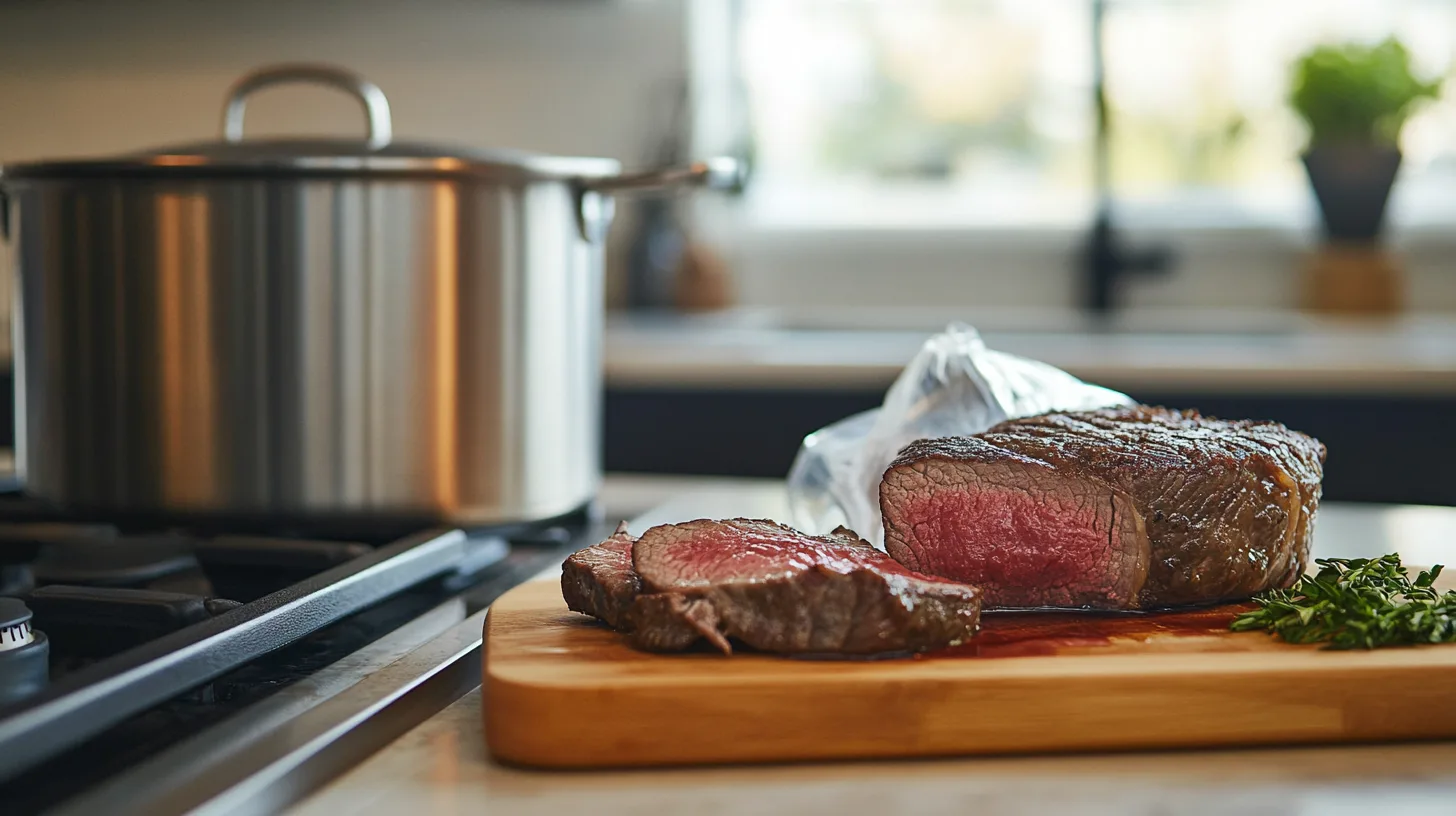
We felt stuck, because we craved that perfectly cooked steak, the one that’s juicy all the way through, and the thought of another dry, overcooked chicken breast just felt like the worst.
But, what if I told you that special machine isn’t really needed?
You can get those amazing results using stuff you’ve probably already got in your kitchen.
This changes things, right?
For a deeper dive into this technique, check out our Sous Vide Cooking Guide to master precise temperature control and perfect your results.
What is Sous Vide Cooking (and Why Do It)?

Sous vide is a fancy French term that essentially means “under vacuum.”
In this method, food gets sealed in a bag, then hangs out in a temperature-controlled water bath.
Because the water never goes above a very precise temperature, your food cooks perfectly evenly.
Think of it like a gentle, warm bath for your dinner.
The edges of your steak won’t be gray and overdone while the center is still rare.
Nope, it’s perfect from edge to edge.
This is great for meal prepping too.
The big wins?
Tender meats, vibrant veggies, and no more cooking guesswork.
Seriously, it’s almost impossible to mess up.
Want to refine your technique? Check out our Sous Vide Calculator to ensure you’re using the right times and temperatures for each food type.
Can You Effectively Sous-Vide Without A Dedicated Machine?

Absolutely!
Sous vide cooking without a machine is easier than you believe.
While an immersion circulator (that fancy gadget) makes things super convenient, it’s not the only way to get the job done.
We’re going to show you how to get those pro results using common kitchen tools rather than the sous-vide machines.
The secret is understanding the basic principle: consistent water temperature.
Essential Tools (Beyond the Immersion Circulator)

Forget the expensive equipment! You should use the following, and you probably already own these:
A large pot or a cooler, some trusty zip-top bags (the good kind, not the flimsy ones), and a reliable thermometer.
A digital one is best, but even an old-school candy thermometer can work in a pinch.
It is also a great idea to get some binder clips, and kitchen tongs will be used too.
Want to learn more about key kitchen gear? Explore our Names of Cooking Equipment guide to get familiar with the best tools for every method.
Method 1: The Precise Stovetop Method
This is where your inner kitchen scientist comes out. We’re going to use your stovetop to create a controlled water bath.
First, fill your biggest pot with water.
Then, clip your thermometer to the side, making sure it’s submerged but not touching the bottom. Now, turn on the heat – low and slow is the name of the game.
Our plan is to reach the desired temperature for your food (we’ll get to specific temperatures later).
Use your tongs to gently move water, and add ice if it gets too hot.
This is key to achieving a uniform temp.
Mastering Stovetop Temperature Control
This is the tricky part, but don’t sweat it. It’s all about small adjustments.
Your stovetop is like a wild horse – it wants to go from zero to sixty. We need to tame it.
Once you get close to your target temperature, turn the heat down really low, or even turn it off completely for a bit.
Keep a close eye on that thermometer, you do not want wild swings in degrees.
Adding a little hot or cold water can help you fine-tune the temperature.
Method 2: The Insulated Cooler (Beer Cooler) Technique
This method is surprisingly effective, especially for longer cooking times.
Your trusty beer cooler, known for keeping drinks icy cold, can also maintain a remarkably stable warm temperature.
Preheat your cooler: Fill it with hot tap water and let it sit for a few minutes.
This warms up the insulation.
Now, dump out that water and fill the cooler with water that’s a few degrees above your target cooking temperature.
Why?
Because the food and the cooler itself will slightly lower the water temperature.
The Water Displacement Method – How To Seal Bags Perfectly

This is crucial for good results, no matter which method you choose. We need to get all the air out of the bag to ensure even cooking and prevent floating.
Place your food in a zip-top bag.
Now, slowly lower the bag into a pot of water (or even your cooler full of water), leaving just the very top of the seal open.
The water pressure will push the air out.
Once the water is right up to the seal, zip it closed.
And you did it.
If you love efficient cooking techniques, you’ll also appreciate our Mastering the Boiling Cooking Method for perfect temperature control in various recipes.
Food Safety Considerations for No-Machine Sous Vide
Let’s talk safety, because nobody wants a surprise visit from food poisoning.
Cooking at lower temperatures for longer times means we need to be extra careful.
Make sure you’re using high-quality, food-grade plastic bags.
Always start with fresh ingredients, and it is best practice to chill your food thoroughly after cooking if you’re not eating it right away.
And, most important, follow reliable temperature guidelines for the specific food you’re cooking.
Best Foods (and Recipes) to Cook with These Methods
Some foods are just made for this kind of cooking. Try:
Steaks become unbelievably tender and evenly cooked.
Chicken breasts stay juicy and flavorful.
Fish, especially delicate ones like salmon, cook to flaky perfection, and you might use it for eggs, for that perfect soft-boiled texture.
Vegetables retain their color and nutrients beautifully.
Start with a simple recipe, like a steak cooked to medium-rare (around 130-135°F).
Looking for more sous vide-friendly dishes? Try this Bistro Steak Recipe for a restaurant-quality steak cooked to perfection.
Common Mistakes and How to Avoid Them
We’ve all been there – learning a new cooking technique can have its bumps.
The biggest mistake?
Not monitoring the temperature closely enough.
Get a good thermometer, and check it often.
Another common oops?
Using flimsy bags.
Invest in quality zip-top freezer bags to avoid leaks.
And finally, don’t overcrowd the pot or cooler.
Give the water room to circulate around the food.
Taking it to the Next Level: Advanced No-Machine Techniques
Once you’ve mastered the basics, you can start experimenting.
Some folks use a small aquarium pump to circulate the water in a cooler setup, achieving even more precise temperature control.
Others get really geeky and use a PID controller (a device used in industrial settings) to regulate their stovetop – but that’s definitely entering advanced territory!
If you’re ready for more advanced cooking, explore Decoding Culinary Abbreviations & Meanings to elevate your kitchen expertise.
FAQs: Your No-Machine Sous Vide Questions Answered
Yep, as long as you use food-grade, BPA-free bags designed for high temperatures. Don’t use cheap, thin ones!
It depends on the food. Some things, like steak, can hang out for a few hours. Others, like fish, have a shorter window. Always check a reliable recipe.
Small adjustments are key! Use a smaller burner, try adding small amounts of hot or cold water, or even use a larger pot to help stabilize the temperature.
Absolutely! Veggies like carrots, asparagus, and potatoes come out amazing.
The stovetop method is your friend. Just be prepared to monitor the temperature more closely.
While not strictly necessary, a quick sear in a hot pan adds that delicious crust and beautiful color.
For a deeper dive into this technique, check out our Sous Vide Cooking Guide to master precise temperature control and perfect your results. Or, If you want to refine your technique, check out our Sous Vide Calculator to ensure you’re using the right times and temperatures for each food type.
The Final Bite
We’ve shown you how to unlock the magic of sous vide, no fancy equipment needed.
It might seem a little intimidating at first, but with a little practice, you will be creating restaurant-quality meals from your own kitchen.
Now you can enjoy, perfect steaks, super tender chicken, and vibrant veggies.
It is a game changer.
Want more kitchen secrets and easy, delicious recipes delivered straight to your inbox? Sign up for the Simply Delicious Newsletter by Edible Exposure Media – it’s packed with tips and tricks to make you a more confident cook.
Disclosure: This article uses automation for structure, but all insights and advice are provided by Ryan Yates, an experienced executive chef with over 20 years of expertise. Additionally, this post may contain affiliate links, which means we may earn a small commission if you purchase through them, at no extra cost to you. This helps support our work and allows us to keep providing high-quality content.