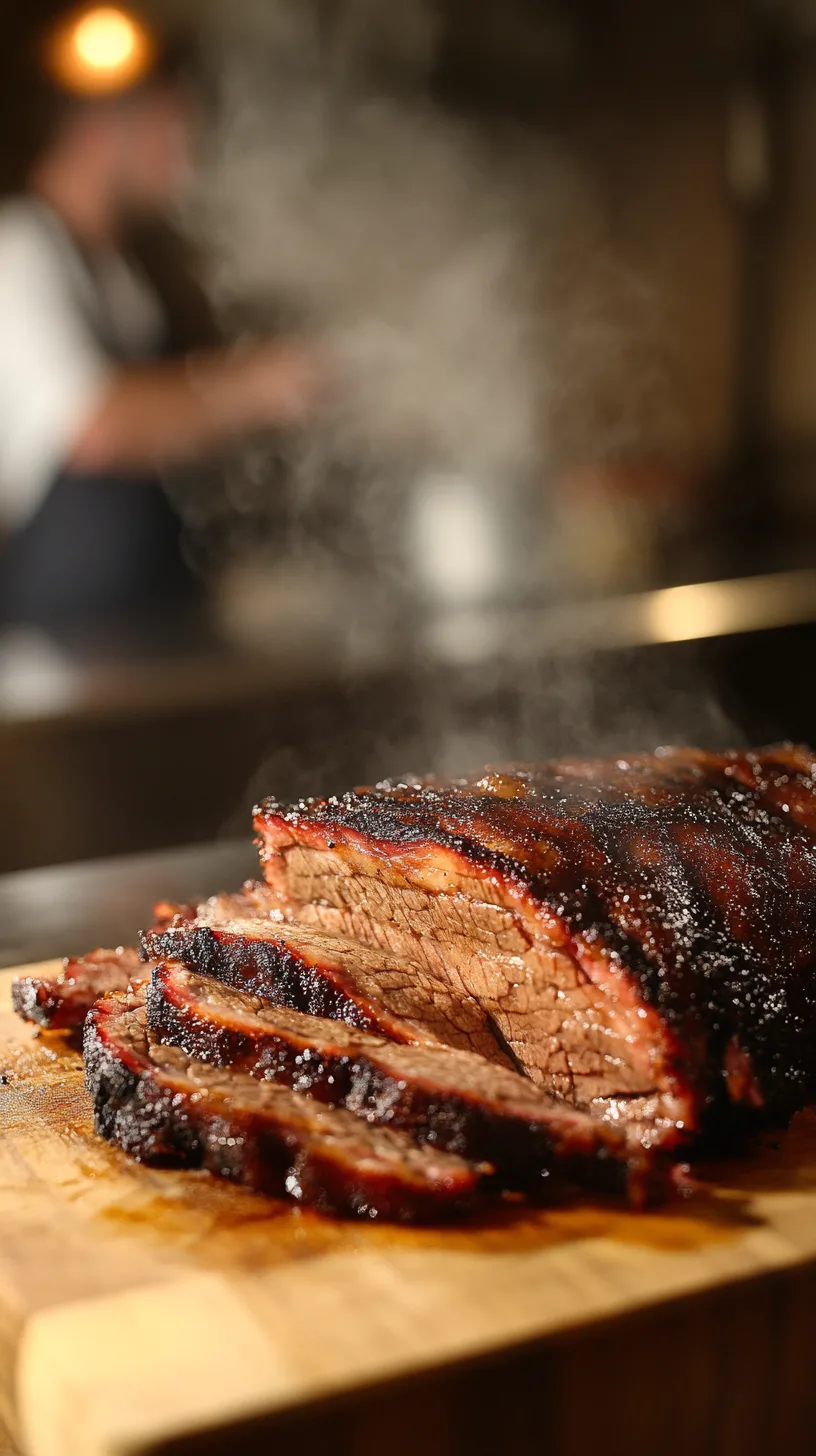
Simple Brisket Brine Recipe Unlocks The Secrets To Mouthwatering Meat
You’re staring at a big, beautiful hunk of beef brisket. Excitement mixes with a touch of fear.
Will it be the tender, juicy masterpiece you dream of? Or a tough, dry disappointment? Lots of folks mess up brisket.
We get it.
But here’s the good news: a simple brisket brine recipe is your secret weapon.
It is a game changer, making sure that hunk of meat turns into something special.
This guide will take you through it all.
Understanding Brisket And Why a Brine Makes All the Difference

Brisket is a cut of beef. It comes from the breast section of the cow.
This part of the cow gets worked hard.
That means it is full of connective tissue.
Cooked wrong, it’s like chewing shoe leather, but cooked low and slow and it can be great.
That is where the magic of brining comes in.
A brine is simply a saltwater solution, often with added flavors.
The salt does amazing things at a molecular level.
It helps break down those tough muscle fibers, making your brisket way more tender.
It also draws moisture into the meat, so it stays juicy even after hours of cooking. We’re talking fall-apart tender.
After you master this brisket brine, you might want to try your hand at other ambitious recipes, like a classic Beef Wellington Recipe for a truly show-stopping main course.
Choosing the Right Brisket for Brining: Flat vs. Point
Two main parts, the flat and the point, make up a whole brisket, also called a “packer” brisket.
The flat is leaner. It is what you often see sliced at barbecue joints.
The point is fattier and often used for burnt ends.
Which one should you choose?
If you’re a beginner, the flat might be a little easier to handle because it is more uniform in shape.
The point has more fat.
But, man, that extra fat means extra flavor and moisture.
Honestly, there is no wrong answer.
Both the flat and the point benefit from a good brine. Choose what looks good to you and what fits your budget.
If you are new to cooking larger cuts of meat and find the process a bit intimidating, don’t worry; we have a guide on decoding meat cuts that breaks it all down for you.
The Essential Ingredients: Building Your Brisket Brine
Now let’s talk about what goes into this magical elixir. This simple brine is made with things you can find anywhere. You might have them at home already.
- Water: This is the base. It is what everything else dissolves into. Water is so important for carrying the brine into the meat. Use clean, cold water.
- Kosher Salt: This is the big one, the star of the show! Kosher salt is ideal because of its coarse texture and lack of additives. Table salt is too fine. Salt is what tenderizes the brisket and adds flavor from the inside out.
- Brown Sugar: A little sweetness balances out the saltiness. It also helps with browning during cooking, giving your brisket a beautiful color. Brown sugar has molasses. That adds a nice depth of flavor.
- Worcestershire Sauce: It brings that umami, a savory richness. A little goes a long way to making your brisket more complex.
- Garlic: Everyone loves garlic. Crushing the cloves releases their flavor into the brine, infusing the brisket with a subtle garlicky goodness.
- Onion: Like garlic, onions add a savory depth. Quartering them exposes more surface area to the brine. This is how the flavors get in the water.
- Black Peppercorns: Peppercorns give a little bit of heat and a warm, spicy flavor. Crack them coarsely for the best effect. That way their flavor comes out easily.
- Bay Leaves: These add an almost herbal, slightly minty note. They are subtle, but they are part of what makes this brine special.
- Thyme: This herb brings an earthy, slightly lemony flavor to your brine.
- Smoked Paprika: Here’s our secret weapon. A little bit of smoked paprika adds a hint of smokiness, even before you put the brisket on the smoker.
Once you’ve selected your brisket, consider how you’ll serve it; a flavorful brisket can be the star of many dishes, just like how our Authentic Birria Tacos Recipe highlights tender, shredded beef.
Simple Steps to a Perfect Brisket Brine: A Beginner’s Guide
Making the brine is super easy.
Even if you’re a total novice in the kitchen, you can do this.
Just follow these simple steps.
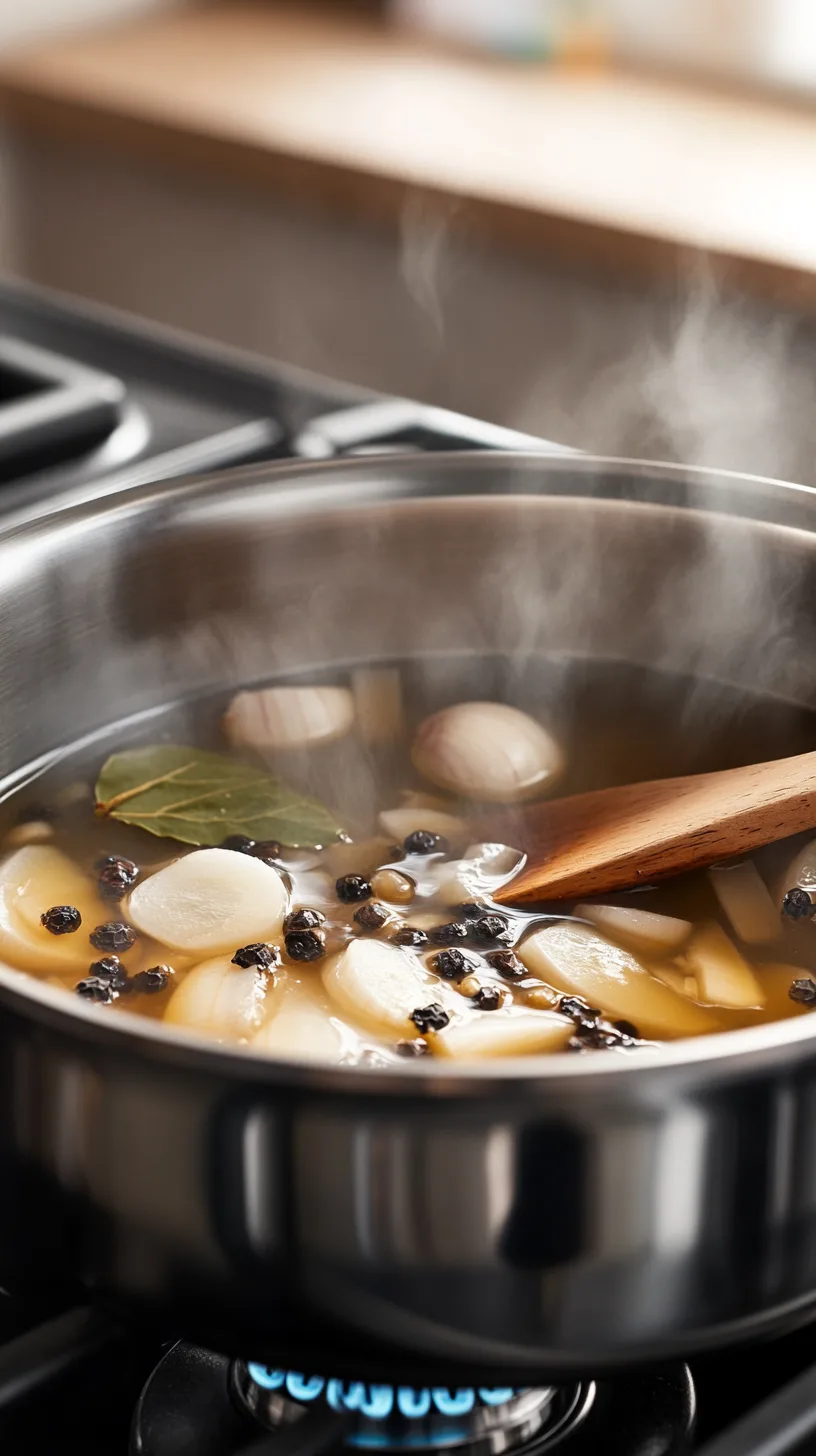
First, grab a big pot. You will combine 4 cups of water with the kosher salt and brown sugar.
Next, put that pot on the stove and turn the heat to medium.
Gently simmer and stir, dissolving that salt and sugar completely.
Once it’s all dissolved, it’s flavor time!
Throw in your smashed garlic, the onion, those cracked peppercorns, bay leaves, thyme, and our secret weapon, the smoked paprika.
Stir it all up, take the pot off the heat, and let it sit.
You have to let the flavors mix together for about 15 minutes.
After that add the rest of your water and the Worcestershire.
Now, let that brine cool all the way down.
A cold brine is essential.
Just as you wouldn’t rush the brining process, you’ll want to take your time crafting the perfect side dishes, like these flavorful Citrus Roasted Brussels Sprouts.
Brining Your Brisket: A Step-by-Step Walkthrough
Alright, your brine is ready. It is time to get that brisket soaking.
- The Right Container: You need something big enough to hold the brisket and the brine, and it has to fit in your fridge. Food-grade plastic or glass containers work great. Avoid metal, as it can react with the salt.
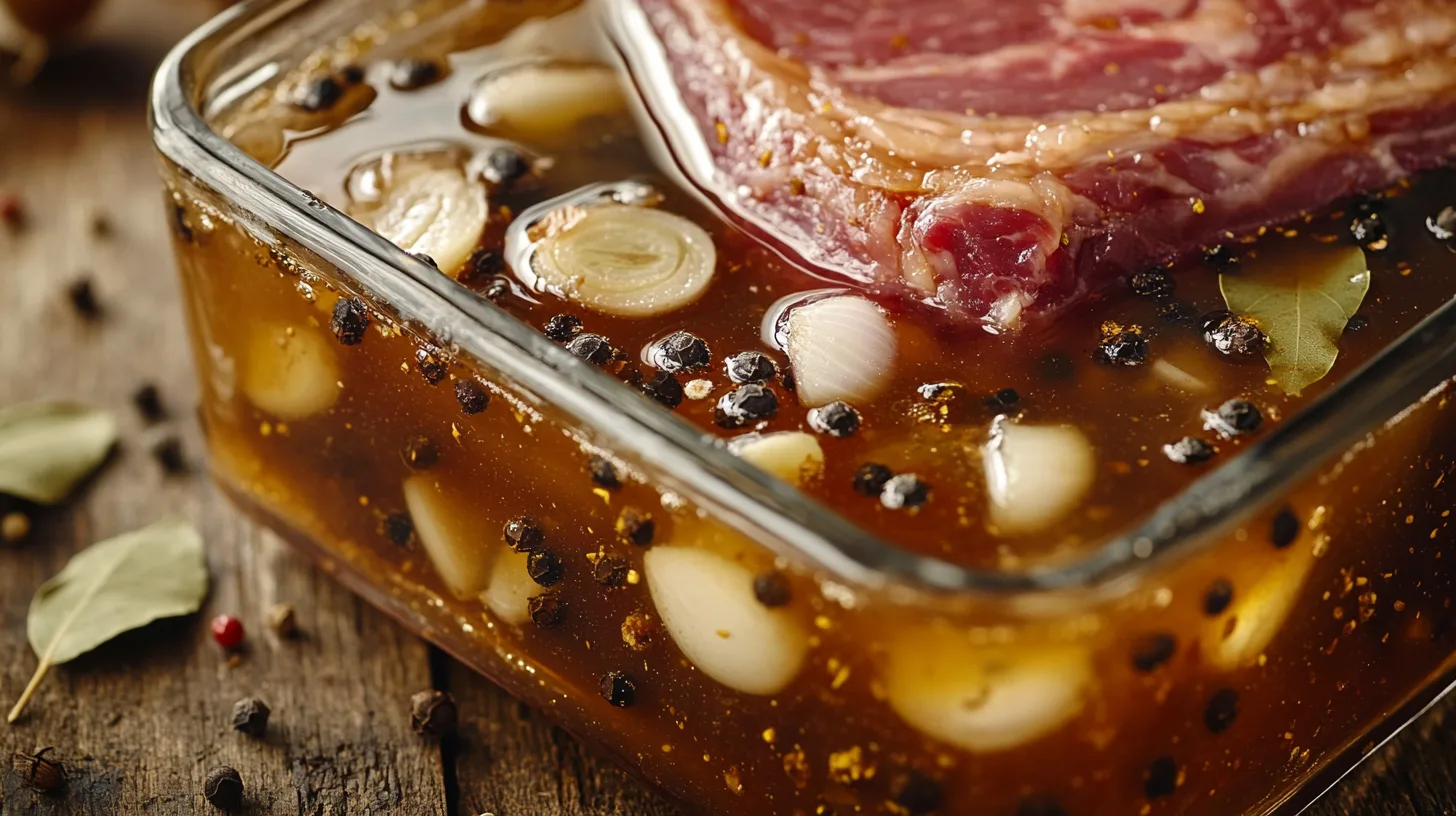
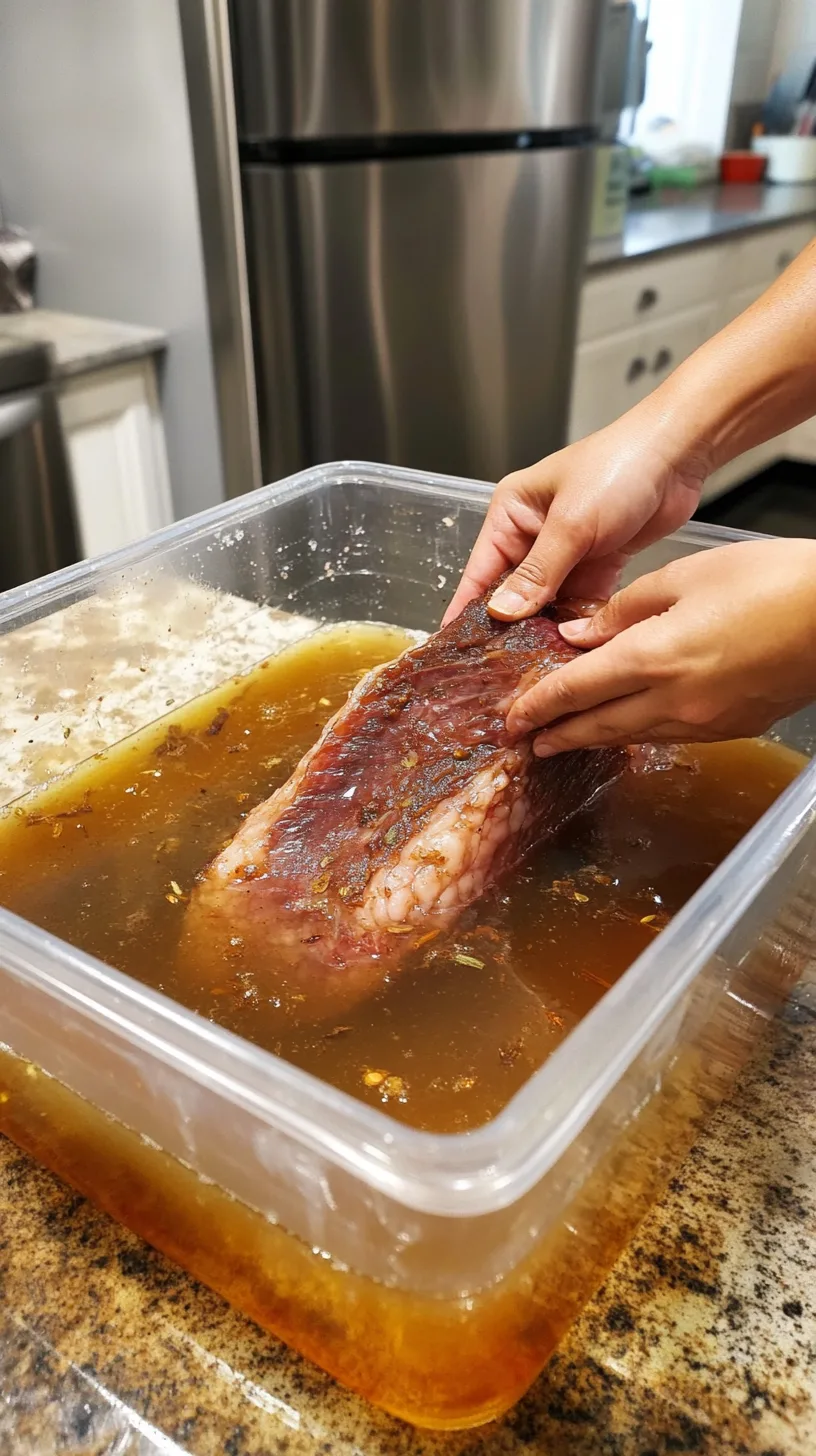
- Submerge It: Gently place your brisket into the container. Now, pour that cooled brine over the meat. You want the brisket completely covered in liquid.
- Weigh It Down: Brisket likes to float. To keep it submerged, put a heavy plate on top, or a jug of water, to weigh it down.
- Into the Fridge: Cover the container tightly with a lid or plastic wrap. Pop it in the refrigerator. The cold temperature is crucial for food safety.
Beyond the Basics: Tips for a Truly Exceptional Brined Brisket
So, you know the basics of brining. But, we want to share a few extra tips to make your brisket even better.
- Trim or Not to Trim? Some folks trim the fat cap on their brisket, others don’t. A little fat is good. It adds moisture and flavor. But too much fat can get in the way of the cooking. It is up to you.
- Pink Salt (Curing Salt): Some people add pink curing salt to their brine. This is also called Prague Powder #1. It gives the meat a pink color and can help preserve it. If you use it, follow the instructions carefully. It’s powerful stuff. Too much is not safe.
- Don’t Over-Brine: More is not better when it comes to brining. Stick to the one hour per pound rule. Too long in the brine, and your brisket can get way too salty. The texture can also get messed up.
Once you have mastered this brine, you can get wild with other recipes that use similar flavor profiles, like our savory Simple Beef Short Ribs Recipe.
Brining Time And How Long is Long Enough?
The million-dollar question. How long does that brisket need to bathe in its flavorful brine?
The general rule is about 1 hour per pound of brisket.
A 10-pound brisket should brine for around 10 hours.
A 15-pound brisket? About 15 hours.
You can go a little shorter or a little longer, but do not exceed 24 hours. Set a timer or write it down so you don’t forget.
The Ultimate, Foolproof Simple Brisket Brine Recipe
Print
Simple Brisket Brine Recipe
- Prep Time: 15 minutes
- Brine time: 12-24 hours (or about 1 hour per pound)
- Cook Time: (Dependent on cooking method – refer to your brisket recipe for smoking/cooking instructions)
- Total Time: 12 hours 15 minutes (minimum)
- Yield: 10–12 servings (adjust based on brisket size) 1x
- Category: Preparation
- Method: No-cook
- Cuisine: American, Barbecue, Texas
Description
Ever wonder how those pitmasters get their brisket so darn juicy and flavorful? It’s not magic; it’s the brine! This simple recipe is your secret weapon to achieving brisket nirvana. We’re talking about a tender, melt-in-your-mouth experience that will have your friends and family begging for more. This brine is easy to make and uses common ingredients you probably already have in your pantry. Get ready to elevate your brisket game to a whole new level!
Equipment:
- Large stockpot or saucepan
- Large non-reactive container (food-grade plastic or glass) to hold the brisket and brine
- A heavy plate, gallon jug of water, or other clean, heavy object to keep the brisket submerged
- Whisk
- Measuring cups and spoons
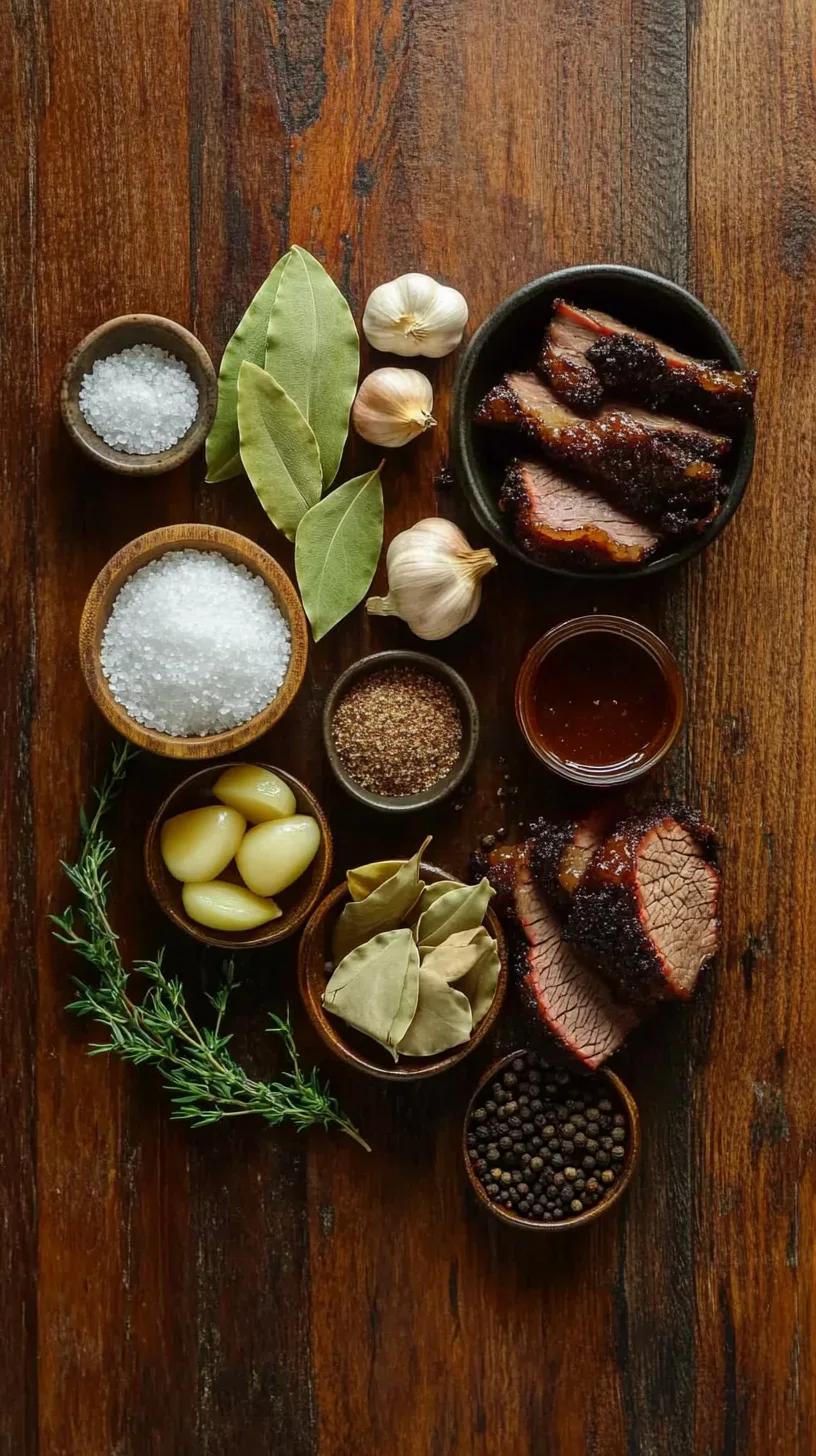
Ingredients
- 1 gallon (16 cups) of cold water, divided.
- 1 cup kosher salt
- 1 cup packed brown sugar
- 1/4 cup Worcestershire sauce
- 4 cloves garlic, smashed
- 1 medium yellow onion, quartered
- 2 tablespoons black peppercorns, coarsely cracked
- 4 bay leaves
- 1 teaspoon dried thyme
- 1/2 teaspoon smoked paprika (This is the unique element!)
- Optional: 1 tablespoon pink curing salt (Prague Powder #1) – Use this only if you’re familiar with curing salts and understand their proper use. It can enhance color and preservation, especially for longer smokes.
Instructions
- Get Things Started: In your stockpot, combine 4 cups (one quart) of the water with the kosher salt and brown sugar. The sugar and salt are going to need a little help to dissolve.
- Heat it Up: Bring the mixture to a gentle simmer over medium heat, stirring frequently until the salt and sugar are completely dissolved. You are not trying to boil it.
- Flavor Bomb: Add the smashed garlic, quartered onion, cracked peppercorns, bay leaves, thyme, and smoked paprika to the pot. Stir well to combine.
- Infuse and Cool: Remove the pot from the heat and let the brine steep for about 15 minutes. Then, add the remaining 12 cups of cold water and the Worcestershire sauce. This will help cool it down quickly. You need the brine to be completely cool before adding the brisket.
- Brisket Bath: Place your brisket in your large non-reactive container. Pour the cooled brine over the brisket, making sure the meat is completely submerged. If the brisket wants to float, use a heavy plate, a gallon jug filled with water, or another weight to keep it fully underwater.
- Chill Out: Cover the container tightly and place it in the refrigerator. Let the brisket brine for at least 12 hours, or approximately 1 hour per pound of brisket. Don’t rush this step.
- Rinse (Optional): After brining, remove the brisket from the container. Some folks like to give the brisket a quick rinse under cold water to remove any excess surface salt, but this is optional. Pat the brisket dry with paper towels.
- Cook it Up!: Your brisket is now perfectly brined and ready to be cooked according to your favorite recipe, whether it is smoking, oven-roasting, or slow-cooking.
Notes
- Why Smoked Paprika? Most brisket brine recipes don’t call for smoked paprika. Adding this ingredient subtly enhances the smoky flavor profile of the brisket, giving it an extra layer of depth that complements the cooking process, especially if you’re smoking it. It’s a small change that makes a noticeable difference.
- Don’t Over-Brine: Brining for too long can make the meat too salty and affect the texture. Stick to the recommended brining time of about 1 hour per pound.
- Food Safety: Always keep the brining brisket refrigerated below 40°F (4°C) to prevent bacterial growth. Use a meat thermometer to be sure.
- Trim or Not to Trim: Whether you trim the fat cap on your brisket before brining is a personal preference. Some fat is good for flavor and moisture, but too much can impede the cooking process.
- If you are pressed for time a good rule of thumb is to allocate 1 hour of brining time per pound of meat.
- Remember to fully submerge the brisket in the brine. This is important for an even brine distribution.
Nutrition
- Serving Size: (per serving, brine only)
- Calories: 50
- Sugar: 12g
- Sodium: 2300mg
- Fat: 0g
- Saturated Fat: 0g
- Carbohydrates: 12g
- Fiber: 0g
- Protein: 0g
- Cholesterol: 0mg
Your Brisket Brining Questions Answered
Let’s tackle some common questions folks have about brining brisket:
- Can I use table salt instead of kosher salt? You can, but kosher salt is better because of its larger crystals. If you use table salt, use less. About ¾ cup should do it.
- Do I have to rinse the brisket after brining? Some people do, some don’t. It depends on how salty you like your food. If you’re worried about it being too salty, give it a quick rinse.
- Can I brine for less than 1 hour per pound? You can, but you might not get the full benefit of the brine. If you’re short on time, aim for at least 6 hours. Any less and you aren’t really doing much.
- What if I don’t have a container big enough for my brisket? You can cut the brisket into smaller pieces. Just make sure they all fit in the brine. Or, you can use a really large, heavy-duty zip-top bag, the 2.5 gallon ones.
- Can I add other flavors to my brine? Sure! Try adding some hot sauce, different herbs like rosemary, or even citrus fruits like oranges or lemons. Get creative!
- Is pink salt necessary? Nope, it is totally optional. It adds a pink color and helps with preservation, especially if you’re smoking the brisket for a long time.
- My brisket is still tough after brining and cooking. What gives? Brisket takes a long time to cook to get it tender. It needs to be cooked low and slow. Did you cook it to an internal temperature of around 200-205°F? If not, that’s probably the problem.
The Final Bite
You’ve got the know-how. That brisket is going to be legendary.
The brine is your secret handshake with flavor.
Each bite is a testament to your new found skill. Want more?
For recipes that make every meal an experience, check out the Simply Delicious Newsletter from Edible Exposure Media.
I’m Ryan Yates, with 20 years in kitchens, from line cook to executive chef, and I share my best in each issue.
Happy cooking!
About the Author
Ryan Yates is a culinary expert with over 20 years of experience in commercial kitchens. As a working executive chef, he has a passion for creating delicious, accessible recipes that bring joy to home cooks everywhere. Ryan believes in the magic of simple ingredients and loves sharing his knowledge to help others find happiness in cooking.