Pumpkin Banana Bread That Sets in the Middle Instead of Turning Gummy
Two purees in one batter sounds additive! More pumpkin flavor, more banana sweetness, more everything.
What it actually does is stack liquid on liquid until the center of the loaf never finishes setting while the edges overbake trying to catch up.
That’s the batter version of a wet log: dense at the core, dry at the crust.
The fix isn’t a longer bake.
Once the puree gets too high relative to the flour and egg, additional oven time mostly drives moisture from the outer crumb while the center remains disproportionately moist and structurally weak.
Why Two Purees Compete Instead of Combine
Pumpkin puree runs close to 90% water. Ripe banana adds more of its own, plus sugar and pectin that behave differently under heat than pumpkin’s starch does.
Put both into a batter sized for one puree, and you’ve increased moisture and soluble solids without adding enough flour or egg structure to carry them.
The starch will still gelatinize as the loaf bakes, but the starch-and-protein network is more diluted, while the additional sugars alter water availability and delay the point at which the crumb fully sets. The result can be a loaf that’s technically baked through and still feels dense or gummy in the center.
I dropped the pumpkin to a half cup and swapped one whole egg for an extra yolk. Whole egg runs close to 76% water, yolk closer to 52%, and a yolk is a good deal smaller to begin with, so the swap reduces added water while preserving richness. It does cost some of the structural protein a whole egg white contributes, which is a trade worth making here, not a source of extra structure on its own.
The Banana Ripeness Call Nobody Talks About
Recipes say “ripe banana” like it’s one thing. A banana that’s just turned yellow with a few brown flecks carries noticeably less free liquid and sugar than one that’s gone fully black and soft. Use the second kind on top of pumpkin, and you’ve compounded the moisture problem before you’ve even opened the flour bag. Medium-ripe is the safer call here – enough sweetness and mash-ability without tipping the batter over. If all you have is an overripe banana, mash it, let it sit in a strainer for ten minutes, and don’t add the liquid that drains off.
Print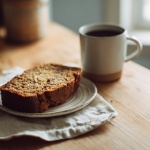
Pumpkin Banana Bread
Description
- A quick bread built to solve the usual problem with combining pumpkin and banana – a gummy, under-set center. Balanced puree ratio and a longer, gentler bake give it a crumb that holds together from edge to center.
- Equipment: 9×5-inch loaf pan, wire cooling rack, kitchen scale (optional, for measuring puree by weight instead of packed cup)
Ingredients
DRY
- 1 3/4 cups all-purpose flour
- 1 tsp baking soda
- 1/4 tsp baking powder
- 1/2 tsp salt
- 1 1/2 tsp ground cinnamon
- 1/4 tsp ground nutmeg
- 1/4 tsp ground ginger
WET
- 1/2 cup canned pumpkin puree (not pumpkin pie filling)
- 1 cup mashed banana (about 2 medium, ripe but not overripe)
- 1/2 cup neutral oil
- 2/3 cup brown sugar, packed
- 1/4 cup granulated sugar
- 1 whole egg
- 1 egg yolk
- 1 tsp vanilla extract
OPTIONAL
- 1/2 cup chopped walnuts or chocolate chips, tossed in 1 tsp flour
Instructions
- Preheat oven to 350°F. Grease a standard 9×5-inch loaf pan or line with parchment.
- Whisk together flour, baking soda, baking powder, salt, and spices in a bowl. Set aside.
- In a separate bowl, whisk oil, brown sugar, and granulated sugar until no dry sugar clumps remain.
- Whisk in the whole egg and egg yolk one at a time, then the vanilla.
- Fold in the pumpkin puree and mashed banana until just combined — do not overmix at this stage.
- Add the dry ingredients to the wet in two additions, folding with a spatula until the last streaks of flour disappear. Fold in nuts or chocolate chips if using.
- Pour batter into the prepared pan and smooth the top.
- Bake 55–65 minutes, tenting loosely with foil around the 35-minute mark if the top is browning faster than the center is setting.
- Test with a skewer inserted at the dead center of the loaf — it should come out with a few moist crumbs clinging, not wet batter.
- Cool in the pan 10 minutes, then turn out onto a rack and cool completely — at least 90 minutes — before slicing.
Notes
I cut the pumpkin down to a half cup and replaced one whole egg with an extra yolk. Two purees already load the batter with more liquid than a single-puree quick bread is built for – richness needed to come from somewhere that didn’t add more water.
SUMMARY
Testing Observation: Early test loaves stayed gummy through the center even at 65+ minutes in the oven. Extending bake time only dried out the crust before the center finished setting. The fix was reducing total puree volume, not increasing time or temperature.
Getting the Center to Set Without Drying the Edges
A standard loaf pan, not a wider or shallower one, matters more than people assume – batter depth controls how evenly heat reaches the center before the top sets. If the top is browning hard before the center firms up, tent it loosely with foil around the 35-minute mark rather than dropping the oven temperature, which just extends total time without fixing the actual issue.
Test doneness near the center, not near the edge – the edges will read done ten minutes before the middle does. A skewer pulled from dead center should come out with a few moist crumbs, not wet batter, and not bone dry either.
The first several test loaves came out gummy through the middle every time, even pushed past 65 minutes. Stretching the bake didn’t fix it – it just dried the crust before the center caught up. The fix was less puree, not more oven time.
If the Middle Sinks or Stays Wet
- Wet, dense center after full bake time: too much combined puree for the flour ratio – cut pumpkin, not banana, since banana carries most of the flavor identity of this loaf
- Sunken top: oven door opened in the first 20 minutes, before the structure set enough to hold its rise
- Dry edges, damp center: dark or thin metal pan absorbing too much heat too fast – drop oven temp 25 degrees and expect a few extra minutes
- Flat loaf, no domed top: baking soda past its potency – test a pinch in vinegar before you commit a whole batch to it
Storage and Freezer Behavior
Refrigeration works against the texture here. Once the starch has gelatinized during baking, its molecules gradually reorganize as the loaf cools and sits – a process called retrogradation. Refrigerator temperatures accelerate that process, which is one reason breads firm and stale faster in the fridge than they do at room temperature. For two to three days, keep the loaf tightly wrapped at room temperature; for longer storage, freeze it.
For longer storage, slice first, wrap individual slices, and freeze flat. Thaw at room temperature still wrapped – unwrapping a frozen slice too early lets condensation form directly on the crumb, and that moisture reads as gumminess even in a loaf that baked correctly. If you want more of this kind of troubleshooting-first approach to fall baking, the Simply Delicious Digest sends that out regularly.
Be sure to build out your complete fall recipe portfolio. Check out all our Fall recipes and Baking Basics recipes this year.
Variations
- Swap half the all-purpose flour for whole wheat; add one extra tablespoon of liquid to compensate for the added absorption
- Dairy-free works cleanly with neutral oil in place of butter – no other adjustment needed
- Fold in walnuts or chocolate chips at the very end, tossed lightly in flour first so they don’t sink
- Increase cinnamon and add a pinch of ground cardamom for a version that leans more toward the pumpkin side than the banana side
The measuring cup lies to you with puree. Pack it down and you’ve added two extra tablespoons of water you never accounted for.
Slice it once it’s fully cool, not warm. The crumb is still setting even after the loaf leaves the oven, and a warm cut will always look gummier than the same loaf twenty minutes later.
Written by Ryan Yates – Executive Chef with 20+ years in commercial kitchens and the culinary voice behind Simply Cooking Recipes.
This article uses automation for structure, but all insights and advice are provided by Ryan Yates, an experienced executive chef with over 20 years of expertise.
Disclosure: Every recipe here is developed and tested by Ryan Yates, a Le Cordon Bleu-trained chef with more than 20 years in professional kitchens. Editorial tools help with formatting and structure. This post may contain affiliate links — if you buy through one we may earn a small commission, at no extra cost to you.