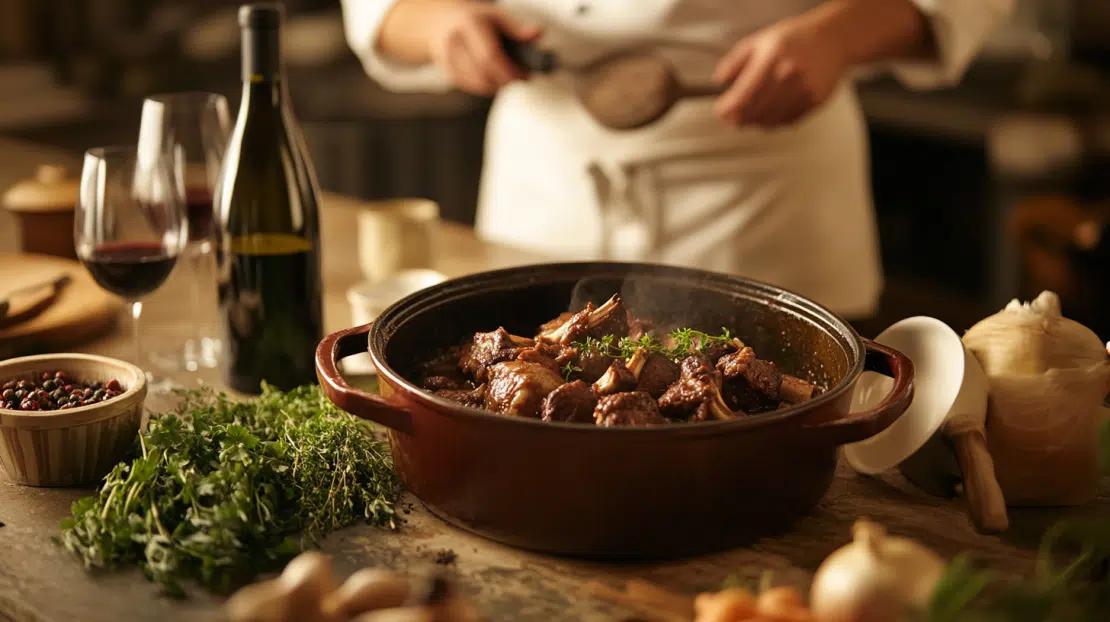
Unlock the Secrets to Flavor and Tenderness By Learning The Braising Technique
Ever pulled a tough piece of meat from the oven, only to find it’s as chewy as shoe leather? We’ve all been there. But what if I told you there’s a cooking method that can transform even the toughest cuts into melt-in-your-mouth masterpieces? Enter the world of braising – your ticket to culinary stardom.
What’s the Big Deal About Braising?
Braising is a cooking technique that turns tough meats tender. It involves searing meat, then slow-cooking it in a small amount of liquid. This method breaks down tough fibers, creating flavorful, melt-in-your-mouth dishes.

Braising is the unsung hero of the culinary world, a cooking technique that transforms humble ingredients into extraordinary meals. But what exactly is braising, and why should you care? Let’s dive into the heart of this flavor-packed method.
The Essence of Braising
At its core, braising is a cooking process that combines dry and moist heat. It’s a two-step dance that starts with a quick sear and ends with a long, gentle simmer. This method is particularly magical for tough cuts of meat, turning them into tender, succulent dishes that melt in your mouth.
The Braising Process – Step-by-Step
The Sear
Awakening Flavors The journey begins with a hot pan and a touch of oil. As the meat hits the sizzling surface, the Maillard reaction kicks in. This chemical process creates hundreds of flavor compounds, giving your meat a deep, rich taste and an appealing brown crust.
The Simmer
Patience is a Virtue After searing, you’ll add just enough liquid to partially cover the meat. This braising liquid could be anything from wine to stock, even beer or cider. The pot is then covered, and the heat is lowered. Now comes the waiting game – the meat cooks slowly, often for several hours.
The Transformation
From Tough to Tender As the meat simmers, an incredible metamorphosis occurs. The tough collagen in the meat begins to break down, converting into gelatin. This process, known as collagen hydrolysis, is what gives braised meat its signature fall-apart texture and rich mouthfeel.
Why Braising Works Wonders
Braising excels at making the most of less expensive, tougher cuts of meat. These cuts, often from well-exercised parts of the animal, are packed with connective tissue. While this tissue makes the meat tough when cooked quickly, it becomes a secret weapon during the braising process.
The low, slow cooking allows the connective tissue to slowly dissolve, resulting in meat that’s not just tender, but also incredibly flavorful. The dissolved collagen enriches the cooking liquid, creating a luscious sauce that’s packed with depth and complexity.
Beyond the Meat: Braising’s Versatility
While meat is often the star of braised dishes, this technique isn’t limited to animal protein. Vegetables, particularly tougher ones like root vegetables, can benefit greatly from braising. The process softens their fibers while concentrating their flavors, resulting in side dishes that are far from afterthoughts.
The Beauty of Braising
What makes braising truly special is its ability to create depth of flavor. As the dish cooks, the ingredients exchange essences. The meat infuses the liquid with its richness, while simultaneously absorbing the flavors of the aromatics and braising liquid. The result is a harmonious dish where every bite tells a story of time, patience, and culinary craftsmanship.
In essence, braising is more than just a cooking method – it’s a transformation. It takes ingredients that might otherwise be overlooked and elevates them into something truly spectacular. Whether you’re a novice cook or a seasoned chef, mastering the art of braising can open up a world of culinary possibilities, allowing you to create deeply satisfying meals that warm both body and soul.
Selecting the Perfect Cuts for Braising

When it comes to braising, choosing the right cut of meat is crucial. The beauty of this cooking method lies in its ability to turn tough, often overlooked cuts into tender, flavorful masterpieces. Let’s explore the best candidates for your braising pot and why they work so well.
Understanding the Ideal Braising Cut
The perfect braising cut typically has a few key characteristics:
- Tough muscle fibers: These break down during the long cooking process.
- High collagen content: Collagen melts into gelatin, creating rich texture.
- Marbling: Intramuscular fat adds flavor and moisture.
Top Contenders for Braising Excellence
Beef: The Classic Choice
- Chuck Roast: This shoulder cut is well-marbled and full of connective tissue, making it ideal for dishes like pot roast.
- Brisket: Known for its robust flavor, brisket transforms from tough to tender when braised.
- Short Ribs: These deliver a melt-in-your-mouth experience when cooked low and slow.
Pork: Versatile and Flavorful
- Shoulder (Boston Butt): Perfect for pulled pork, this cut becomes incredibly tender and flavorful.
- Pork Belly: Rich in fat, it develops a luscious texture when braised.
Lamb: Rich and Succulent
- Shanks: These tough leg cuts become fall-off-the-bone tender, ideal for dishes like osso buco.
- Neck: Often overlooked, lamb neck is incredibly flavorful and becomes wonderfully tender.
Poultry: Yes, It Can Be Braised!
- Chicken Thighs: Dark meat stands up well to braising, remaining juicy and flavorful.
- Turkey Legs: These tough cuts become succulent when braised.
Other Noteworthy Contenders
- Oxtails: Rich in gelatin, they create incredibly silky sauces.
- Beef Cheeks: These become meltingly tender and are prized in many cuisines.
The Economics of Braising
One of the most appealing aspects of braising is its economic efficiency. Many of the best cuts for this method are often less expensive because they’re tougher and require longer cooking times. This means you can create gourmet-quality meals without the gourmet price tag.
Braising Cuts With Cost and Cooking Guide
| Cut | Price/lb | Cooking Time | Flavor | Best Uses | Cooking Tips | Care Instructions |
|---|---|---|---|---|---|---|
| Chuck Roast | $5-$7 | 3-4 hours | Rich, beefy | Pot roasts, stews, shredded beef | Sear the meat before braising to lock in flavors. Cook slowly for tender results. | Store leftovers in airtight containers. Reheat gently to maintain moisture. |
| Pork Shoulder | $3-$5 | 4-5 hours | Succulent | Pulled pork, carnitas, pork stew | Trim excess fat but leave some for flavor. Cook low and slow for juicy texture. | Refrigerate leftovers in a covered dish. Reheat with a splash of broth or sauce. |
| Lamb Shanks | $8-$10 | 2-3 hours | Robust | Braised lamb, Moroccan dishes, tagines | Brown shanks on all sides before braising. Use aromatic herbs for added depth. | Keep in a sealed container. Reheat slowly in the oven or on the stove. |
| Chicken Thighs | $2-$4 | 1-1.5 hours | Juicy | Chicken stew, coq au vin, braised chicken | Remove skin for a leaner dish or leave on for extra flavor. Braise until tender. | Store in the refrigerator. Best reheated gently in a covered dish to retain moisture. |
Additional Information:
- Cut: The specific type of meat ideal for braising.
- Price/lb: Approximate cost per pound, which can vary by region and supplier.
- Cooking Time: Suggested braising time to achieve the best texture and flavor.
- Flavor: The general taste profile of the cut once it’s braised.
- Best Uses: Recommended dishes or types of cuisine where this cut shines.
- Cooking Tips: Useful advice to help achieve the best results when braising.
- Care Instructions: Best practices for storing and reheating leftovers to maintain quality.
Beyond Meat: Vegetable Braising
While meat is often the star of braised dishes, don’t overlook vegetables. Tougher vegetables like cabbage, leeks, and fennel can be transformed through braising. They absorb the flavors of the cooking liquid while maintaining their integrity, creating delicious side dishes or vegetarian main courses.
The Art of Selection
Choosing the right cut for braising is an art that combines culinary knowledge with economic savvy. By selecting these often-overlooked cuts, you’re not just saving money – you’re participating in a culinary tradition that values patience, technique, and the transformation of humble ingredients into extraordinary meals.
Remember, the key to successful braising lies not in the initial appearance or tenderness of the meat, but in its potential for transformation. Those tough, sinewy cuts that might seem challenging are actually your ticket to a world of rich, complex flavors and melt-in-your-mouth textures.
In essence, braising is about seeing the potential in the overlooked, the beauty in the beast. It’s a cooking method that rewards patience and understanding, turning kitchen underdogs into the stars of your culinary show. So next time you’re at the butcher, don’t shy away from those less glamorous cuts – embrace them, and let the magic of braising unfold in your kitchen.
The Supporting Cast Of Aromatics and Liquids

The secret to a truly exceptional braise lies not just in the choice of meat, but in the careful selection of aromatics and liquids. These elements form the backbone of flavor, transforming a simple dish into a culinary masterpiece.
Aromatics: Building the Flavor Foundation
Aromatics are the unsung heroes of the culinary world, providing depth and complexity to your braise. They infuse the dish with layers of flavor that complement and enhance the main ingredient.
Mirepoix
At the heart of many braised dishes is the mirepoix, a classic combination of:
- Onions: Providing sweetness and depth
- Carrots: Adding a subtle earthy sweetness
- Celery: Contributing a savory, slightly peppery note
This trio forms the base of countless dishes, offering a balanced flavor profile that enhances without overpowering.
Beyond the Basics
While mirepoix is a classic, don’t be afraid to explore other aromatic combinations:
- Garlic: Adds pungency and warmth
- Leeks: Offer a milder, sweeter onion flavor
- Ginger: Brings a spicy, zingy note (great for Asian-inspired braises)
- Fennel: Provides a subtle anise flavor, excellent with pork or fish
Herbs and Spices: The Flavor Enhancers
Herbs and spices can elevate your braise from good to extraordinary:
- Thyme: A versatile herb that pairs well with most meats
- Rosemary: Robust and aromatic, perfect for beef and lamb
- Bay Leaves: Add a subtle, complex flavor
- Peppercorns: Provide a gentle heat and depth
Braising Liquids: More Than Moisture
The choice of braising liquid is crucial, as it not only tenderizes the meat but also infuses it with flavor. Here’s a guide to some popular options:
Braising Guide
| Element | Options | Best For | Flavor Profile | Pro Tips |
|---|---|---|---|---|
| Aromatics | Mirepoix | All meats | Balanced, sweet, earthy | Sauté in oil/butter to enhance flavor. |
| Garlic | Beef, Pork, Chicken, Lamb | Pungent, warm | Add early for mellow, later for sharpness. | |
| Leeks | Chicken, Fish, Pork | Milder, sweeter onion | Clean thoroughly before use. | |
| Ginger | Asian-inspired braises | Spicy, zingy | Add early for warmth. | |
| Fennel | Pork, Fish | Subtle anise | Use bulb and fronds for licorice-like taste. | |
| Herbs/Spices | Thyme | Beef, Lamb, Chicken, Pork | Earthy, versatile | Add at the start for deep infusion. |
| Rosemary | Beef, Lamb, Pork | Robust, aromatic | Use sparingly to avoid overpowering. | |
| Bay Leaves | All meats | Subtle, complex | Remove before serving. | |
| Peppercorns | All meats | Gentle heat | Crush slightly or use whole. | |
| Liquids | Red Wine | Beef, Lamb | Rich, acidic | Deglaze after searing for deep flavor. |
| White Wine | Chicken, Pork, Fish | Light, bright | Pair with stock for balance. | |
| Beer | Pork, Beef | Malty, complex | Combine with cider for unique pork dishes. | |
| Broth | All meats | Savory, enhancing | Use low sodium for better control. | |
| Cider | Pork, Poultry | Sweet, fruity | Combine with beer for fall flavors. | |
| Pro Tips | Toasting Spices | All dishes | Intensifies flavor | Briefly toast in dry pan before using. |
| Layering Flavors | All dishes | Builds complexity | Add hardy herbs early, delicate herbs later. | |
| Deglazing | All dishes | Captures rich flavors | Use braising liquid to scrape up fond. | |
| Balancing Flavors | All dishes | Harmonious, well-rounded | Start with classic combos, adjust to taste. |
Mixing and Matching
Don’t hesitate to combine different liquids for a more complex flavor profile. Some winning combinations include:
- Red wine and beef broth for a rich beef braise
- White wine and chicken stock for a delicate chicken dish
- Beer and apple cider for a unique pork braise
The Importance of Balance
The key to using aromatics and liquids effectively is balance. You want to enhance the main ingredient, not overpower it. Start with a classic combination and adjust based on your preferences and the specific dish you’re creating.
Pro Tips for Aromatic and Liquid Mastery
- Toast your spices: Briefly heating whole spices in a dry pan can release their oils, intensifying their flavor.
- Layer your flavors: Add hardy herbs like rosemary at the beginning, but save delicate herbs like parsley for the end.
- Deglaze with care: Use your braising liquid to scrape up the flavorful bits (fond) from the bottom of the pan after searing.
- Don’t overdo it: Remember, less is often more. You want to complement the main ingredient, not compete with it.
By mastering the use of aromatics and liquids, you’ll elevate your braising game to new heights. These elements work in harmony to create dishes that are rich, complex, and deeply satisfying. Whether you’re sticking to classic combinations or experimenting with new flavors, the right aromatics and liquids will turn your braise into a memorable culinary experience.
The Main Event: Bringing It All Together
Now that you’ve got your ingredients sorted, it’s time for the main event. Here’s how to braise like a boss:
- Season generously: Salt and pepper are your friends. Don’t be shy.
- Sear it good: Get that pan hot and give your meat a beautiful brown crust on all sides.
- Aromatics assemble: Sauté your mirepoix and any other aromatic veggies in the same pan.
- Deglaze like a pro: Add your liquid of choice and scrape up all those flavorful bits from the bottom of the pan. That’s where the magic happens.
- Low and slow: Cover and let it simmer away, either on the stovetop or in the oven. We’re talking 300-325°F for several hours, depending on the cut.
- Patience, young Padawan: Resist the urge to peek too often. Every time you lift that lid, you’re letting precious heat and moisture escape.
The Grand Finale: Finishing Touches
As your braise nears completion, it’s time to think about the finishing touches. This is where you can really elevate your dish from homey to haute cuisine.
- Reduce the sauce: If your braising liquid is a bit thin, remove the meat and reduce it on the stovetop until it’s thick and glossy.
- Fresh herbs: A sprinkle of fresh parsley or cilantro can add a pop of color and freshness.
- Acid is your friend: A squeeze of lemon or a splash of vinegar can brighten up the rich flavors.
Why Every Home Cook Should Embrace Braising
Braising isn’t just a cooking technique; it’s a life skill. Here’s why you should add it to your culinary arsenal:
- It’s forgiving: Unlike some high-stakes cooking methods, braising is pretty hard to mess up. Even if you overcook it a bit, it’ll still be tender and delicious.
- It’s economical: You can turn cheap cuts of meat into restaurant-quality dishes.
- It’s impressive: There’s something about presenting a beautifully braised dish that makes you feel like a culinary rockstar.
- It’s comforting: There’s nothing quite like the aroma of a braise filling your home on a chilly day.
So there you have it, folks. Braising isn’t just cooking; it’s alchemy. It’s taking the ordinary and turning it into the extraordinary. It’s creating meals that not only fill bellies but warm hearts. And isn’t that what cooking is all about?
Next time you’re at the grocery store, pick up one of those tough cuts and give braising a try. Your taste buds (and your wallet) will thank you. Happy braising!
Incredibly Helpful Conversion Charts
Metric to Imperial Liquid Measurements
| Metric Volume | Imperial Volume |
|---|---|
| 5 ml | 1 tsp |
| 15 ml | 1 tbsp |
| 30 ml | 1 fl oz |
| 100 ml | 3.4 fl oz |
| 240 ml | 1 US cup |
| 500 ml | 2.1 US cups |
| 1 liter | 4.23 US cups |
| 1 liter | 33.8 fl oz |
| 1 liter | 1.06 quarts |
| 1 liter | 0.26 gallons |
Here is a link to a very handy liquid volume converter.
Common Baking Ingredient Conversions
| Ingredient | Metric Volume | Imperial Volume | Metric Weight | Imperial Weight |
|---|---|---|---|---|
| Flour | 240 ml | 1 US cup | 120 g | 4.25 oz |
| Granulated Sugar | 240 ml | 1 US cup | 200 g | 7 oz |
| Brown Sugar | 240 ml | 1 US cup | 220 g | 7.75 oz |
| Butter | – | 1 US cup | 227 g | 8 oz |
| Cocoa Powder | 240 ml | 1 US cup | 100 g | 3.5 oz |
| Honey | 240 ml | 1 US cup | 340 g | 12 oz |
| Milk | 240 ml | 1 US cup | 240 g | 8 oz |
| Oil | 240 ml | 1 US cup | 220 g | 7.75 oz |
Check out this handy baking ingredient conversion calculator.
Quick Reference for Teaspoons, Tablespoons, and Cups
| Teaspoons | Tablespoons | Imperial Volume | Metric Volume |
|---|---|---|---|
| 3 tsp | 1 tbsp | 0.5 fl oz | 15 ml |
| 6 tsp | 2 tbsp | 1 fl oz | 30 ml |
| 12 tsp | 4 tbsp | 2 fl oz | 60 ml |
| 16 tsp | 5.33 tbsp | 2.67 fl oz | 80 ml |
| 24 tsp | 8 tbsp | 4 fl oz | 120 ml |
| 48 tsp | 16 tbsp | 8 fl oz | 240 ml |
| 96 tsp | 32 tbsp | 16 fl oz | 480 ml |
| 192 tsp | 64 tbsp | 32 fl oz | 960 ml |